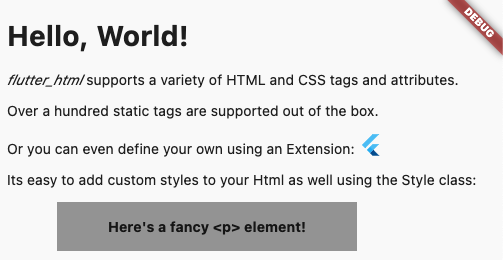
A Flutter widget for rendering HTML and CSS as Flutter widgets.
Widget build(context) {
return Html(
data: """
<h1>Hello, World!</h1>
<p><span style="font-style:italic;">flutter_html</span> supports a variety of HTML and CSS tags and attributes.</p>
<p>Over a hundred static tags are supported out of the box.</p>
<p>Or you can even define your own using an <code>Extension</code>: <flutter></flutter></p>
<p>Its easy to add custom styles to your Html as well using the <code>Style</code> class:</p>
<p class="fancy">Here's a fancy <p> element!</p>
""",
extensions: [
TagExtension(
tagsToExtend: {"flutter"},
child: const FlutterLogo(),
),
],
style: {
"p.fancy": Style(
textAlign: TextAlign.center,
padding: const EdgeInsets.all(16),
backgroundColor: Colors.grey,
margin: Margins(left: Margin(50, Unit.px), right: Margin.auto()),
width: Width(300, Unit.px),
fontWeight: FontWeight.bold,
),
},
);
}becomes...
This package is designed with simplicity in mind. Originally created to allow basic rendering of HTML content into the Flutter widget tree, this project has expanded to include support for basic styling as well!
If you need something more robust and customizable, the package also provides a number of extension APIs for extremely granular control over widget rendering!
For the full API reference, see here.
For a full example, see here.
Below, you will find brief descriptions of the parameters theHtml widget accepts and some code snippets to help you use this package.
The package currently has two different constructors - Html() and Html.fromDom().
The Html() constructor is for those who would like to directly pass HTML from the source to the package to be rendered.
If you would like to modify or sanitize the HTML before rendering it, then Html.fromDom() is for you - you can convert the HTML string to a Document and use its methods to modify the HTML as you wish. Then, you can directly pass the modified Document to the package. This eliminates the need to parse the modified Document back to a string, pass to Html(), and convert back to a Document, thus cutting down on load times.
| Parameters | Description |
|---|---|
data |
The HTML data passed to the Html widget. This is required and cannot be null when using Html(). |
document |
The DOM document passed to the Html widget. This is required and cannot be null when using Html.fromDom(). |
onLinkTap |
Optional. A function that defines what the widget should do when a link is tapped. The function exposes the src of the link as a String to use in your implementation. |
extensions |
Optional. A powerful API that allows you to customize everything when rendering a specific HTML tag. |
shrinkWrap |
Optional. A bool used while rendering different widgets to specify whether they should be shrink-wrapped or not, like ContainerSpan |
onlyRenderTheseTags |
Optional. An exclusive set of elements the Html widget should render. Note that your html will be wrapped in <body> and <html> if it isn't already, so you should include those in this list. |
doNotRenderTheseTags |
Optional. A set of tags that should not be rendered by the Html widget. |
style |
Optional. A powerful API that allows you to customize the style that should be used when rendering a specific HTMl tag. |
More examples and in-depth details are available:
This package is simply a convenience package that exports all the other external packages below. You should use this if you plan to render all the tags that require external dependencies.
This package renders audio elements using the chewie_audio and the video_player plugin.
The package considers the attributes controls, loop, src, autoplay, width, and muted when rendering the audio widget.
Add the dependency to your pubspec.yaml:
flutter pub add flutter_html_audio
import 'package:flutter_html_audio/flutter_html_audio';

Widget html = Html(
  data: myHtml,
  extensions: [
    AudioHtmlExtension(),
  ],
);This package renders iframes using the webview_flutter plugin.
When rendering iframes, the package considers the width, height, and sandbox attributes.
Sandbox controls the JavaScript mode of the webview - a value of null or allow-scripts will set javascriptMode: JavascriptMode.unrestricted, otherwise it will set javascriptMode: JavascriptMode.disabled.
Add the dependency to your pubspec.yaml:
flutter pub add flutter_html_iframe
import 'package:flutter_html_iframe/flutter_html_iframe';

Widget html = Html(
  data: myHtml,
  extensions: [
    IframeHtmlExtension(),
  ],
);
You can set the navigationDelegate of the webview with the navigationDelegate property on IframeHtmlExtension. This allows you to block or allow the loading of certain URLs.
This package renders MathML elements using the flutter_math_fork plugin.
When rendering MathML, the package takes the MathML data within the <math> tag and tries to parse it to Tex. Then, it will pass the parsed string to flutter_math_fork.
Because this package is parsing MathML to Tex, it may not support some functionalities. The current list of supported tags can be found on the Wiki, but some of these only have partial support at the moment.
Add the dependency to your pubspec.yaml:
flutter pub add flutter_html_math
import 'package:flutter_html_math/flutter_html_math';

Widget html = Html(
  data: myHtml,
  extensions: [
    MathHtmlExtension(),
  ],
);
If the parsing errors, you can use the onMathErrorBuilder property of MathHtmlException to catch the error and potentially fix it on your end.
The function exposes the parsed Tex String, as well as the error and error with type from flutter_math_fork as a String.
You can analyze the error and the parsed string, and finally return a new instance of Math.tex() with the corrected Tex string.
If you have a Tex string you'd like to render inside your HTML you can do that using the same flutter_math_fork plugin.
Use a custom tag inside your HTML (an example could be <tex>), and place your raw Tex string inside.
Then, use the extensions parameter to add the widget to render Tex. It could look like this:
Widget htmlWidget = Html(
  data: r"""<tex>i\hbar\frac{\partial}{\partial t}\Psi(\vec x,t) = -\frac{\hbar}{2m}\nabla^2\Psi(\vec x,t)+ V(\vec x)\Psi(\vec x,t)</tex>""",
  extensions: [
    TagExtension(
      tagsToExtend: {"tex"},
      builder: (extensionContext) {
        return Math.tex(
          extensionContext.innerHtml,
          mathStyle: MathStyle.display,
          textStyle: extensionContext.styledElement?.style.generateTextStyle(),
          onErrorFallback: (FlutterMathException e) {
            //optionally try and correct the Tex string here
            return Text(e.message);
          },
        );
      }
    ),
  ],
);This package renders svg elements using the flutter_svg plugin.
When rendering SVGs, the package takes the SVG data within the <svg> tag and passes it to flutter_svg. The width and height attributes are considered while rendering, if given.
The package also exposes a few ways to render SVGs within an <img> tag, specifically base64 SVGs, asset SVGs, and network SVGs.
Add the dependency to your pubspec.yaml:
flutter pub add flutter_html_svg
import 'package:flutter_html_svg/flutter_html_svg';

Widget html = Html(
  data: myHtml,
  extensions: [
    SvgHtmlExtension(),
  ],
);This package renders table elements using the flutter_layout_grid plugin.
When rendering table elements, the package tries to calculate the best fit for each element and size its cell accordingly. Rowspans and colspans are considered in this process, so cells that span across multiple rows and columns are rendered as expected. Heights are determined intrinsically to maintain an optimal aspect ratio for the cell.
Add the dependency to your pubspec.yaml:
flutter pub add flutter_html_table
import 'package:flutter_html_table/flutter_html_table';

Widget html = Html(
  data: myHtml,
  extensions: [
    TableHtmlExtension(),
  ],
);This package renders video elements using the chewie and the video_player plugin.
The package considers the attributes controls, loop, src, autoplay, poster, width, height, and muted when rendering the video widget.
Add the dependency to your pubspec.yaml:
flutter pub add flutter_html_video
import 'package:flutter_html_video/flutter_html_video';

Widget html = Html(
  data: myHtml,
  extensions: [
    VideoHtmlExtension(),
  ],
);Have you followed the instructions as described above?
If so, feel free to file an issue or start a discussion for some extra help.
See the above example.
If you'd like to use this widget inside of a Row(), make sure to set shrinkWrap: true and place your widget inside expanded:
Widget row = Row(
   children: [
        Expanded(
            child: Html(
              shrinkWrap: true,
              //other params
            )
        ),
	    //whatever other widgets
   ]
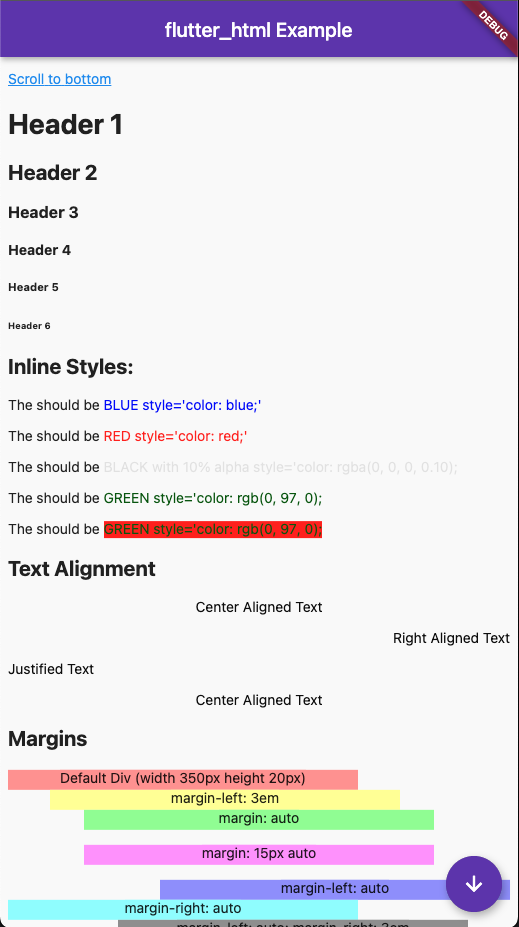
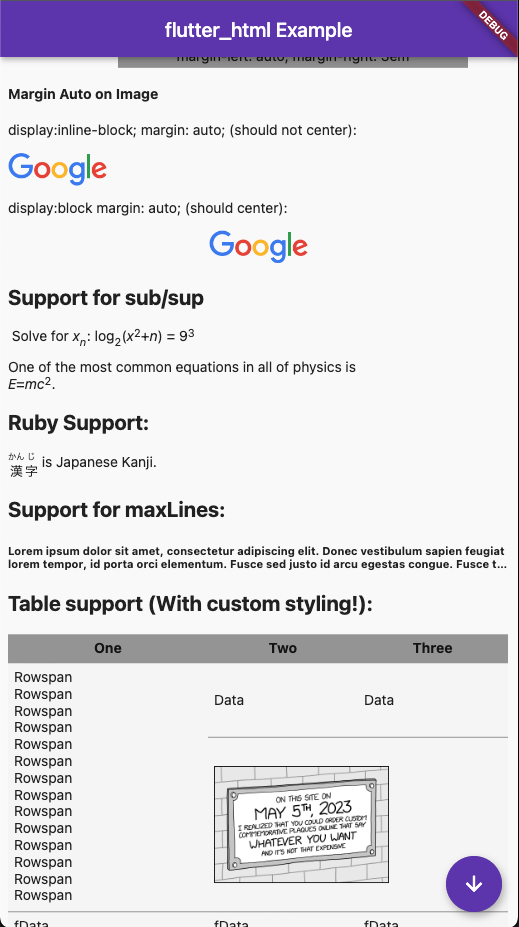
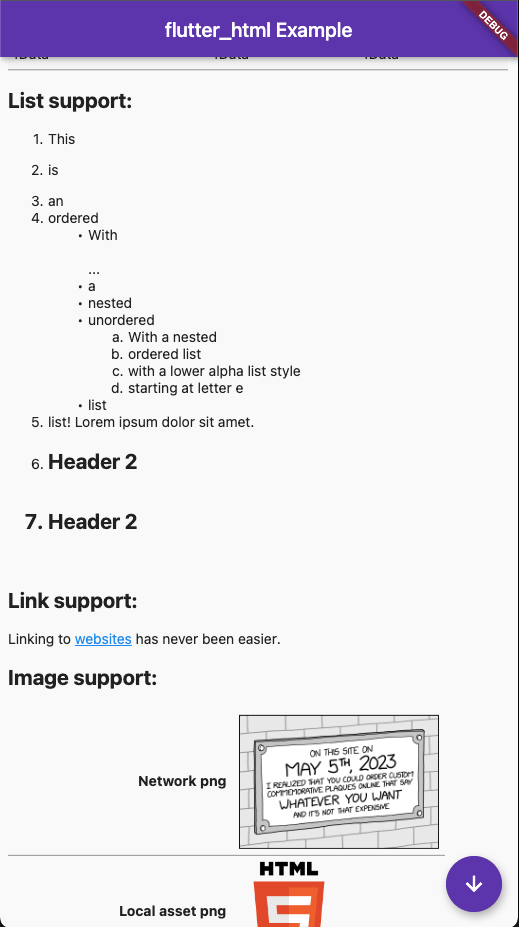
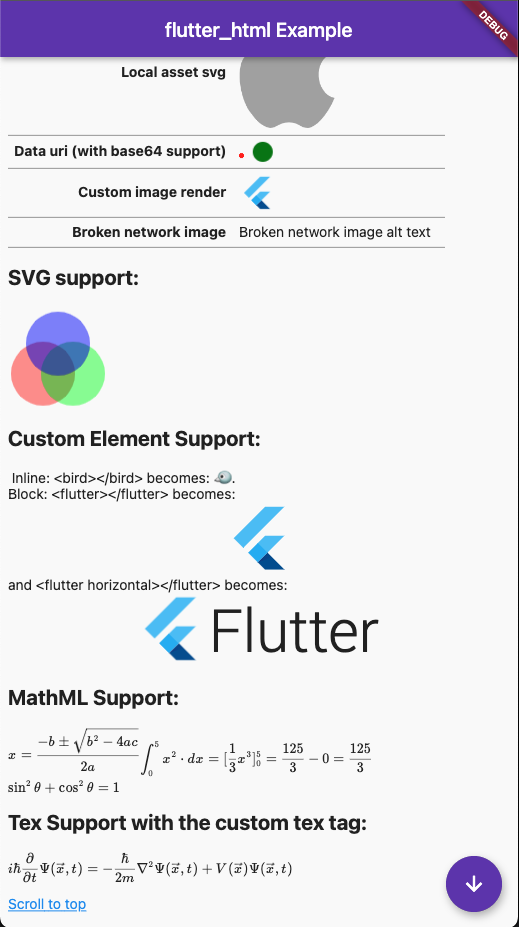
);Here's what the example in example/lib/main.dart looks like after being run (in Chrome):
 |
 |
 |
 |


