Tutorial 1: Edit ontology
In this tutorial we will introduce how to visualize and edit ontologies to define a data model for the robot. For a brief introduction to ontologies and the SkiROS ontology model, please refer to Overview: Data model.
To visualize and edit ontologies, we suggest to use the GUI Protege_5.0. Protege doesn't need to be installed: after the download, you just have to run the run.sh script. We suggest to add the following alias in you ~/.bashrc file:
alias protege="~/path/to/protege/folder/run.sh"
The ontologies are encoded in one or more .owl files., defining which data, concepts, relations and individuals are possible to store to and retrieve from the world model. The core SkiROS ontologies can be found in the folder skiros2/owl and should not be modified. The knowledge base can be extended from the developers with custom OWL ontologies. To create a new extension ontology follow these steps:
- Open protege and go to the
Active Ontologytab (usually is the default one) - Define a name for you ontology in
Ontology IRI - Click on
Direct Importsat the bottom -> select from file -> navigate toskiros2/owlfolder and selectskiros.owl - If asked to resolve missing imports (e.g. RParts.owl) navigate in the folder
skiros2/owl/IEEE-1872-2015and select the corresponding files
To load new ontologies in the world model, user needs to specify a folder with the parameter workspace_dir in the world model launch file. (see skiros2/launch/world_model_server.launch):
<node launch-prefix="$(arg prefix)" name="wm" pkg="skiros2_world_model" type="world_model_server_node" respawn="true">
    <param name="workspace_dir" value="$(find my_package)/owl" />
</node>
All the OWL files found in the specified path are loaded from the world model server at boot.
To create a new robot definition follow these steps:
- Navigate to Entities tab -> Classes subtab
- Expand the tree to reach the robot class (Thing->Entity->Physical->Object->Agent->Robot)
- Select the robot class, then click on the plus icon next to instances (see Fig. 1)
- In the pop-up window, click on add individual button, insert a unique name, press ok and close the pop-up window
- Click on the robot name
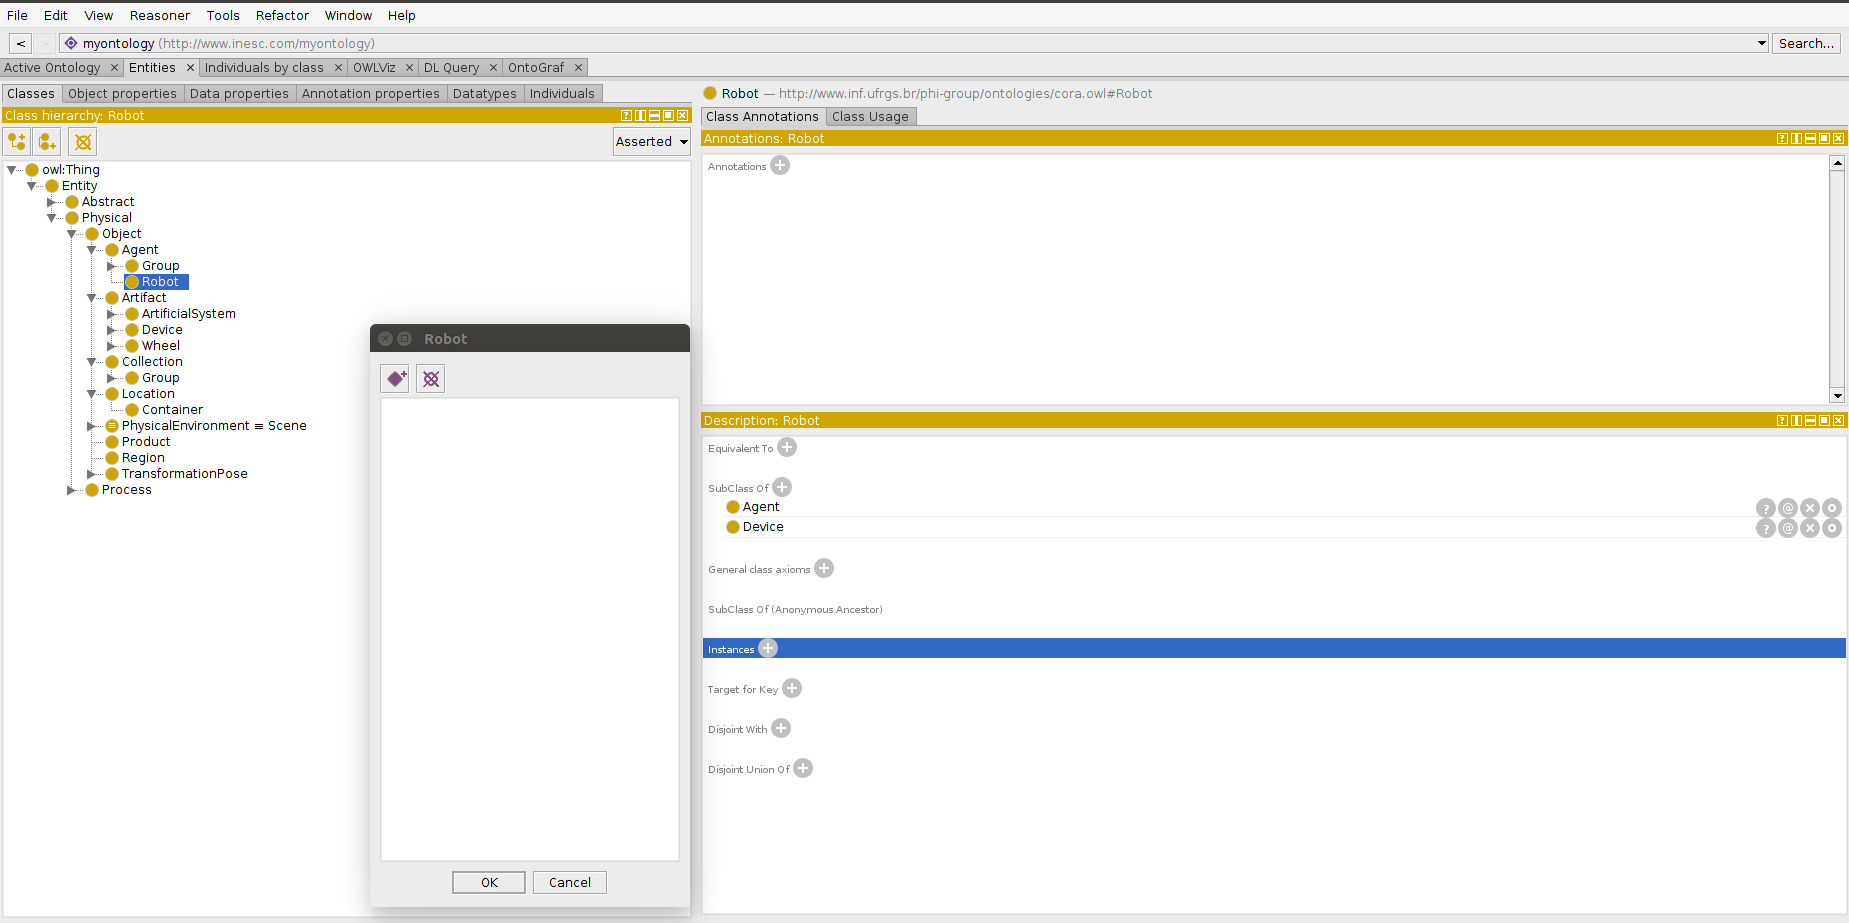
Fig. 1 Add a new robot instance
Now we created a new robot, but without any hardware. In order to add an arm, a gripper and a camera to our robot we can do the following:
- Expand the tree to reach the Arm class (Thing->Entity->Physical->Object->Device->ArmDevice)
- Follow the same procedure used for the robot to create a new arm individual
- Expand the tree to reach the Gripper class (Thing->Entity->Physical->Object->Device->EndEffector->GripperEffector)
- Follow the usual procedure to create a new arm individual
- Expand the tree to reach the Sensor class (Thing->Entity->Physical->Object->Device->MeasuringDevice->Sensor)
- Follow the usual procedure to create a new camera individual
- Switch to
individualssubtab and select your robot (see Fig. 2) - Click on object property assertions and use the relation
hasAand then your HW id - Do the same for all the HW you want to include. NOTE: you can do this hierarchically, so that the gripper is attached to the arm: just select the arm individual and add an assertion with the gripper
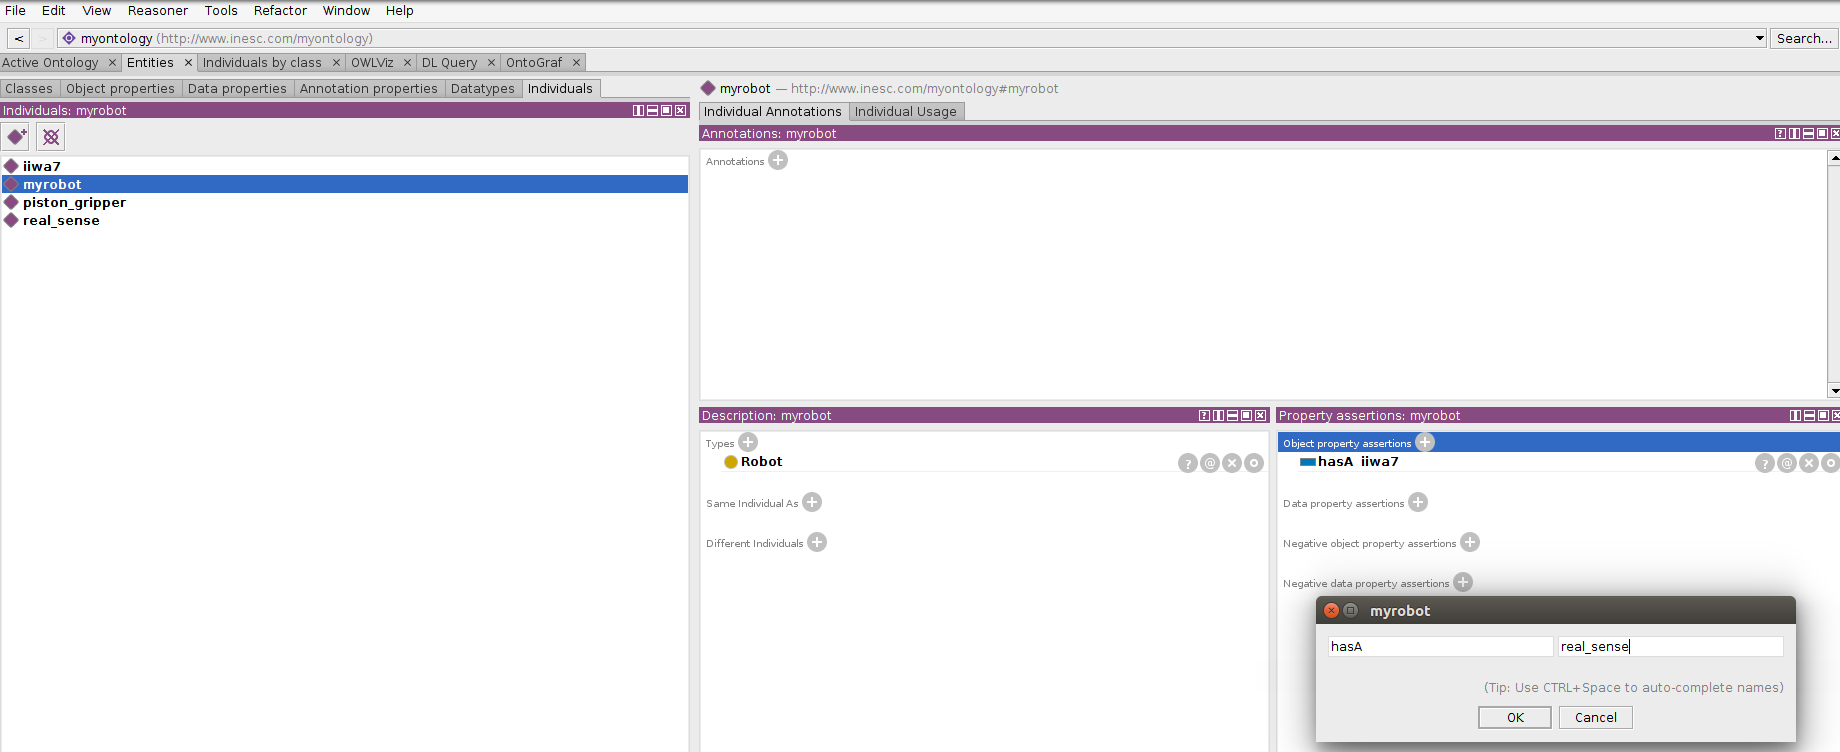 *Fig. 2 Connect new hardware*
Finally, we can modify the properties of your HW to meet your demands by adding a data property assertion. If you want to create a new property type, just navigate to the data properties tab and add a new one. Then you will be able to use that for your data property assertion.
The robot description should not be loaded directly into the world model, since it is always associated to a skill manager node. In order to load your robot definition you have to configure the skill manager in the launch file:
  <include file="$(find skiros2)/launch/skill_mgr.launch">
      <arg name="robot_ontology_prefix" value="myontology"/>
      <arg name="robot_name" value="myrobot"/>
  </include>
Here, the prefix is the name of your ontology (Note: if you defined a name like "http://www.inesc.com/myontology", the prefix will be just myontology) and robot_name is the name of your robot individual. See the tutorial about skill development to see how to access the data properties defined for your hardware. Note: if you get errors with data not being found, always double check you are using the right prefix. E.g. data hasA defined in the skiros ontology will be "skiros:hasA", while data in your ontology will be "myontology:myproperty".