-
Notifications
You must be signed in to change notification settings - Fork 27
Advanced features
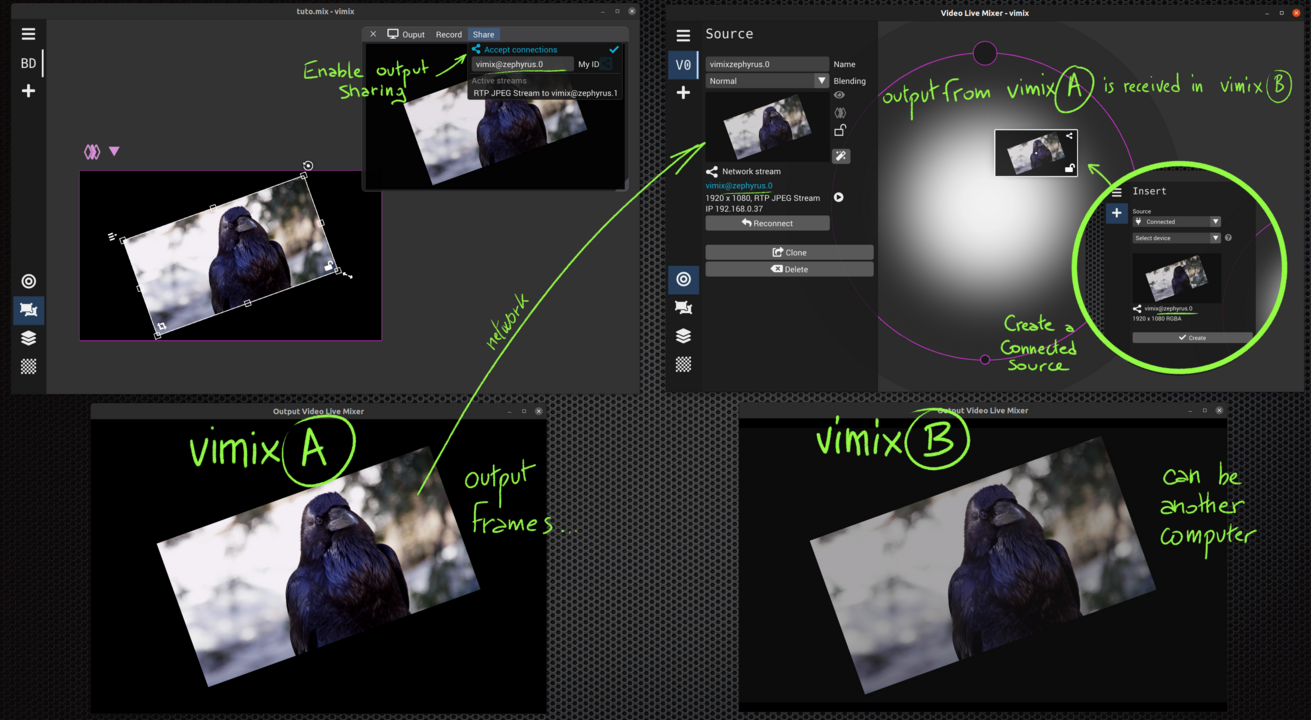
When connected to a local network, all instances of vimix can communicate together, e.g., streaming their output to another vimix running on another computer.
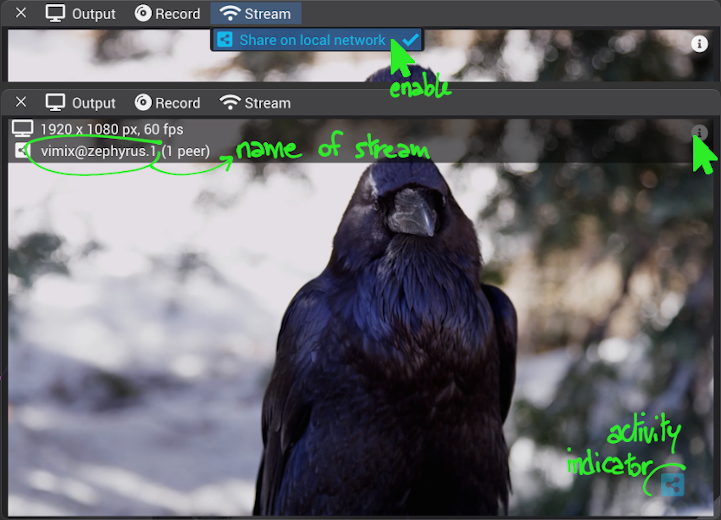
To allow streaming of the output to other vimix, enable Share on local network from the output window:
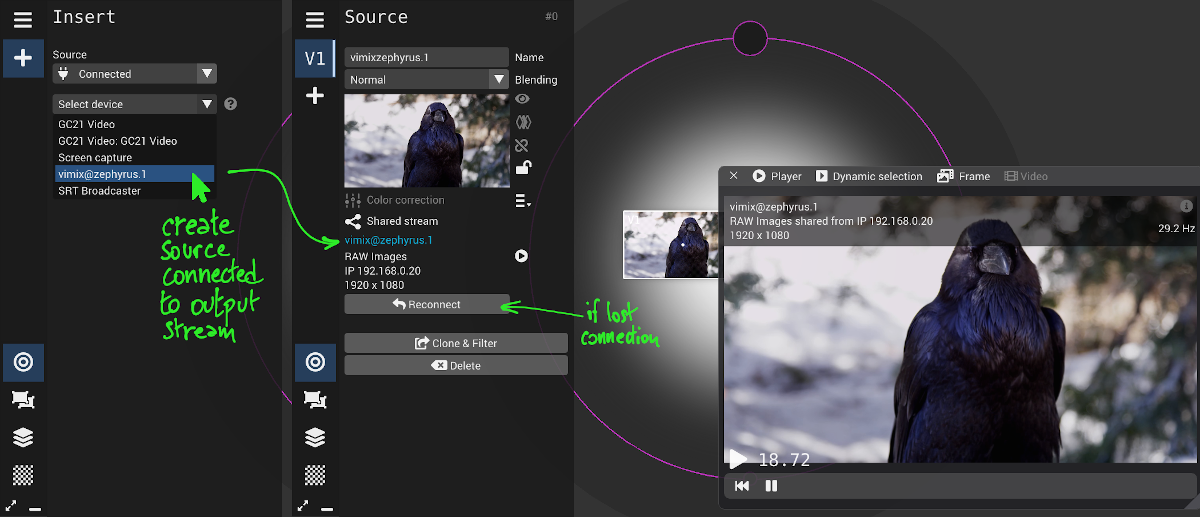
To receive the stream into another vimix, create a Connected source and select the name of the vimix stream
If you try to create a connected source but the distant vimix did not enable sharing on local network, a warning will indicate to do so:

Instead of connecting from another instance of vimix, you can request a stream to vimix using the command line (or a script) by doing the following:
- Prepare to receive an UDP stream on a given port, e.g. port=9000
If vimix settings' P2P codec is JPEG:
gst-launch-1.0 udpsrc port=9000 caps="application/x-rtp,media=(string)video,encoding-name=(string)JPEG" ! rtpjpegdepay ! queue ! decodebin ! videoconvert ! autovideosink
If vimix settings' P2P codec is H264:
gst-launch-1.0 udpsrc port=9000 caps="application/x-rtp,media=(string)video,clock-rate=(int)90000,encoding-name=(string)H264" ! rtph264depay ! h264parse ! queue ! decodebin ! videoconvert ! autovideosin
- Send an OSC request to vimix with the
peertopeertarget and by indicating the port
You can e.g. use the oscsend command from the Lightweight OSC library:
oscsend 127.0.0.1 7000 /vimix/peertopeer/request i 9000
This launches the streaming of vimix output to the gst-launch-1.0 receiver.
To end the streaming, send the OSC request to disconnect:
oscsend 127.0.0.1 7000 /vimix/peertopeer/disconnect i 9000
To automate the connection to vimix, you can use this small bash script (MacOS and Linux).
Importantly, the system settings of vimix should allow the app to access to the network:
OSX Dialog message (Allow to accept):

Ubuntu Settings (allow access to network in panel 'Applications' of Ubuntu settings):

If you create a source from a session file (*.mix), the session source will render the session as if it was opened in vimix.
TIP You can also drag&drop a .mix file into the workspace to create a session file source.

Special actions on a session source are:
-
Importall sources from the .mix file into the current session -
Openthe session as current (close current session)
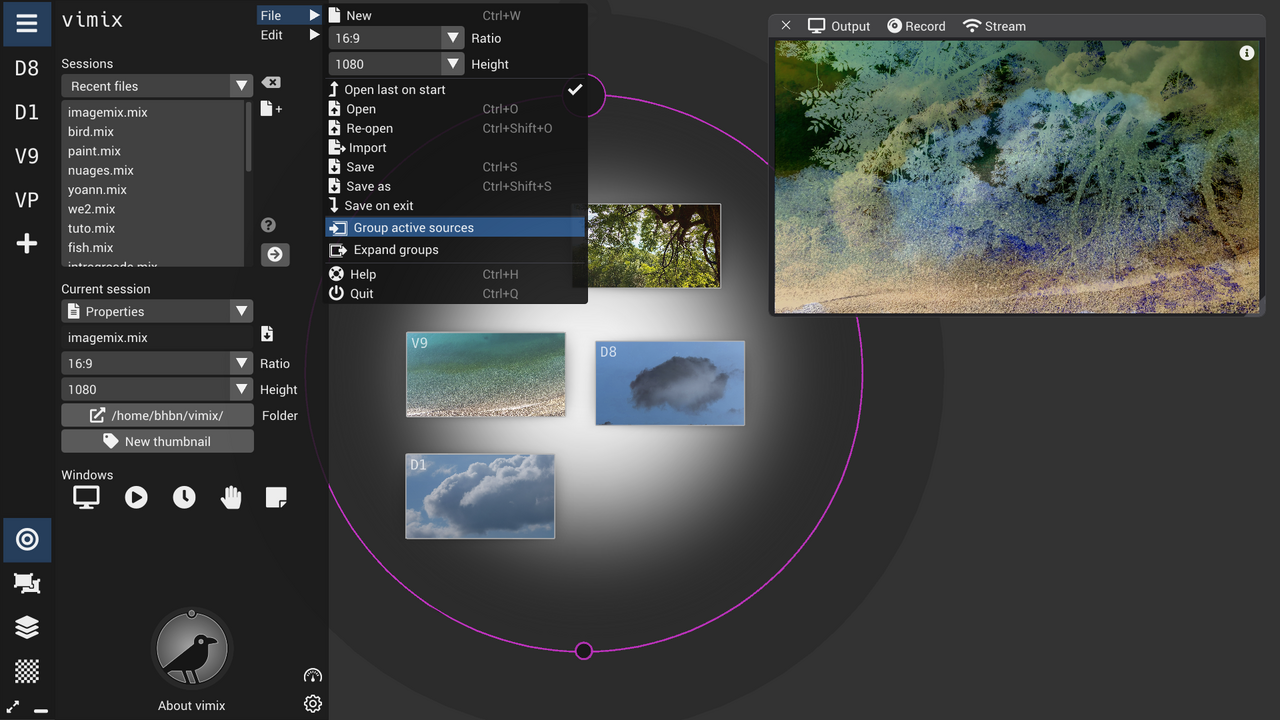
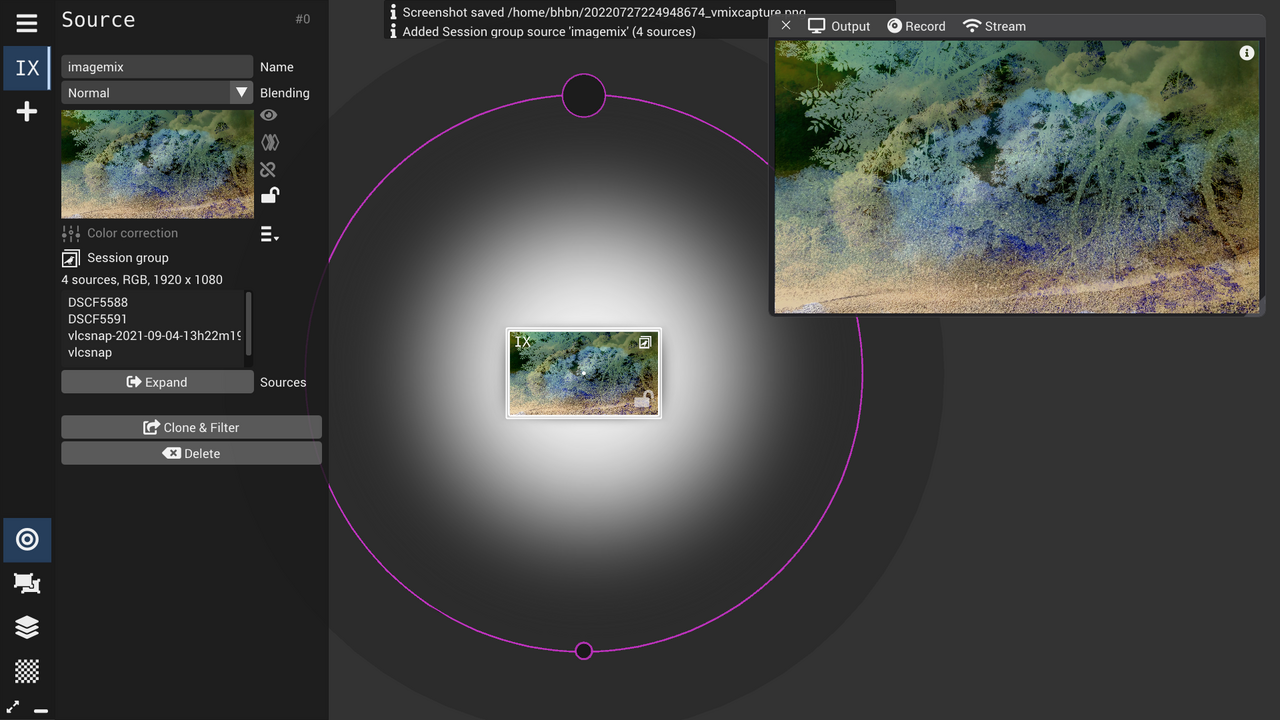
From any view, you can Group active sources from vimix File menu:
The grouping puts all the sources that were active (inside the Mixing circle) into one group.
ℹ️ Note that the global output is not affected by the grouping operation.
Expand the group into sources.
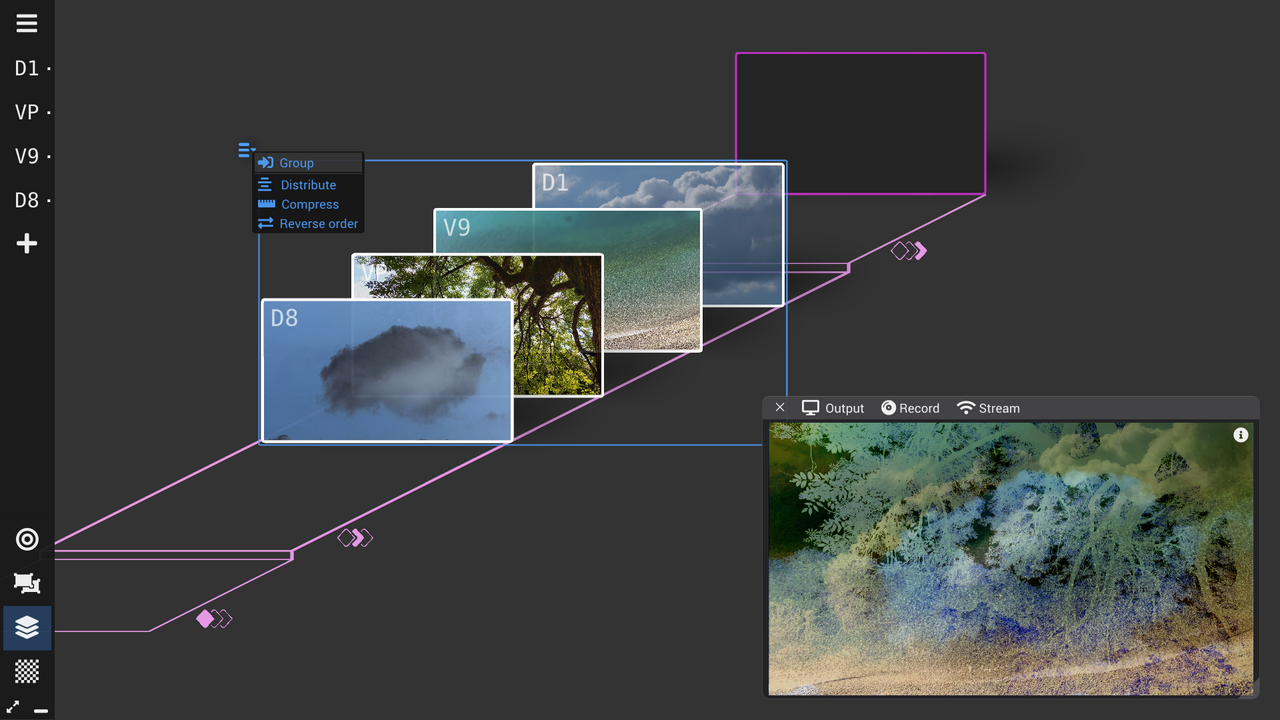
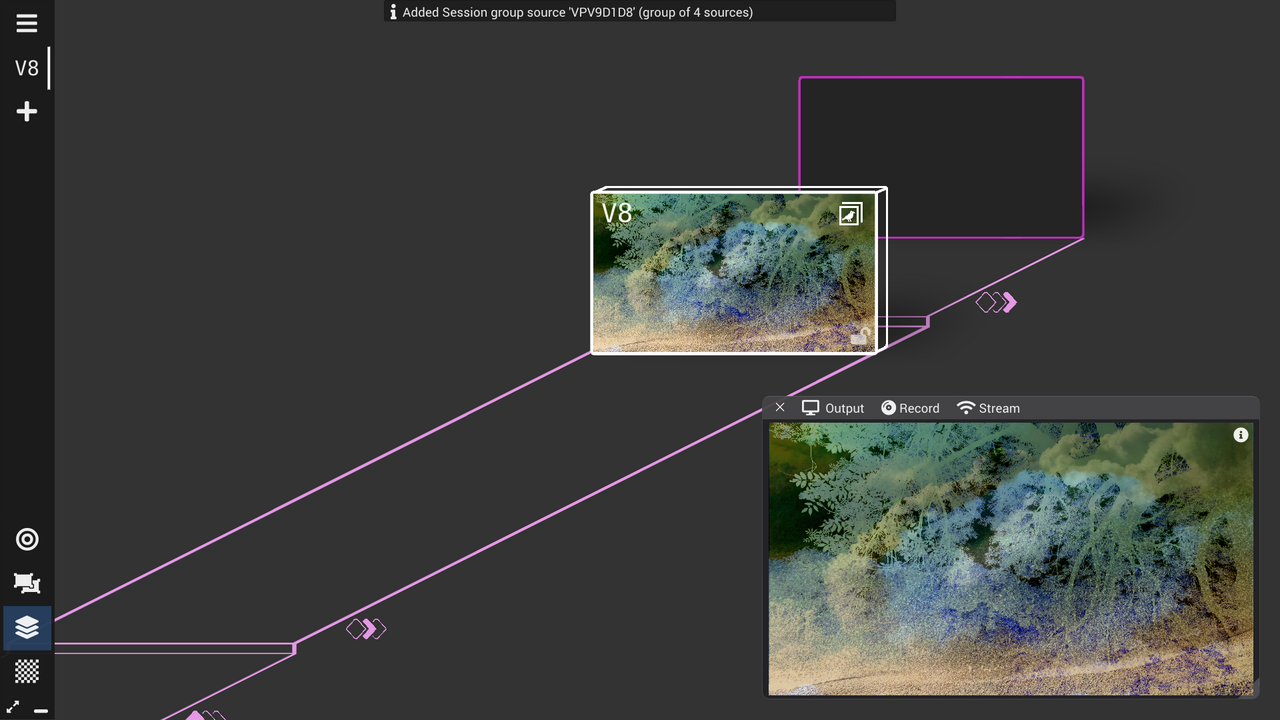
From the Layers view, you can combine multiple consecutive sources into one Group:
The grouping puts the selected sources (consecutive in Layers view) into one group.
ℹ️ The global output might, depending on the blending of sources, be affected by the grouping operation.
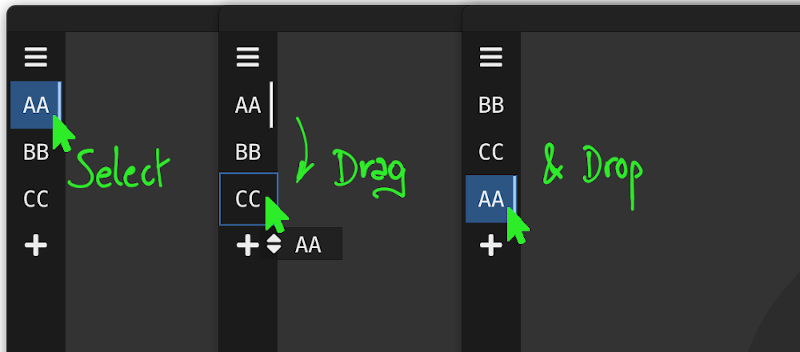
The icons of sources (with initials) on the left bar of vimix can be re-ordered for convenience. The order of icons does not affect the rendering in any way.
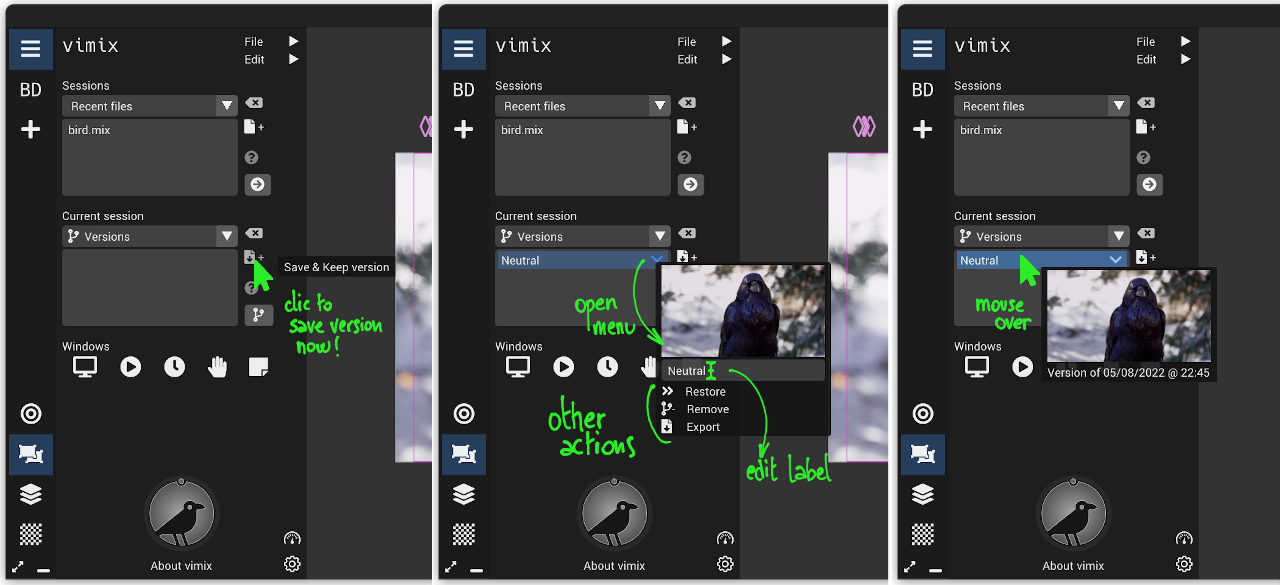
Saving versions inside a session keeps a record of its status at different stages, enabling to come back to previous versions at any time.
To save a version, do Save & Keep version from the Version section of the Current session left panel:
To restore a version, double-click on the version name:
ℹ️ To automatic save a version each time the session is saved (File / Save, Ctrl + S), enable the Iterative saving option that is next to the list of versions.
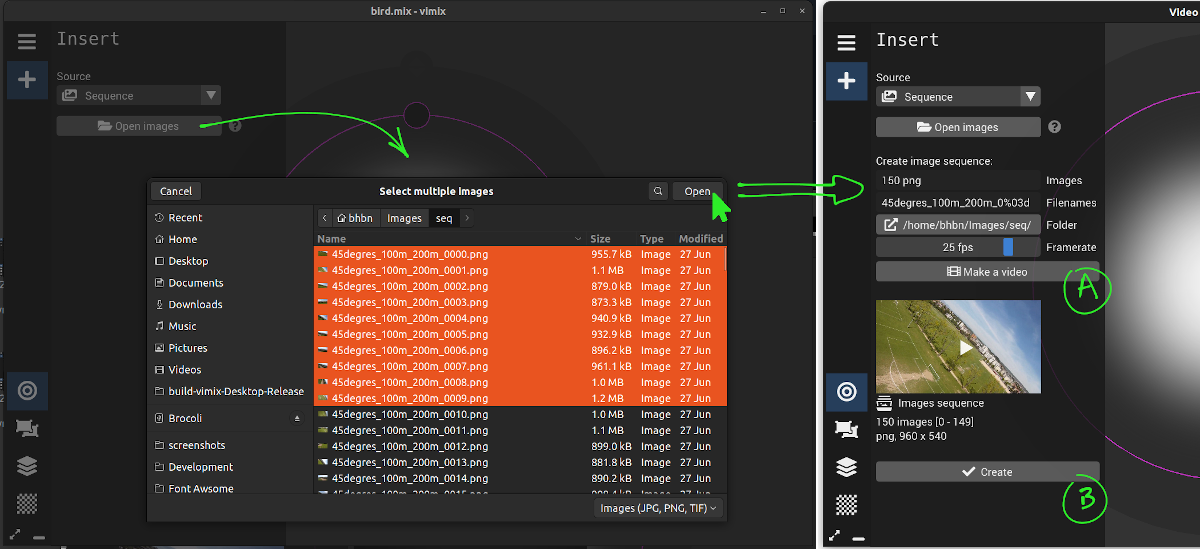
Creating a source from a sequence of images is done inserting a source of type Sequence. Simply open multiple images in one folder (multiple file selection) and validate.
- If the list of filenames is correctly numbered in sequence (e.g. 'image01.png', 'image02.png', etc. up to 'image99.png') then an image sequence source can be created directly (option B above).
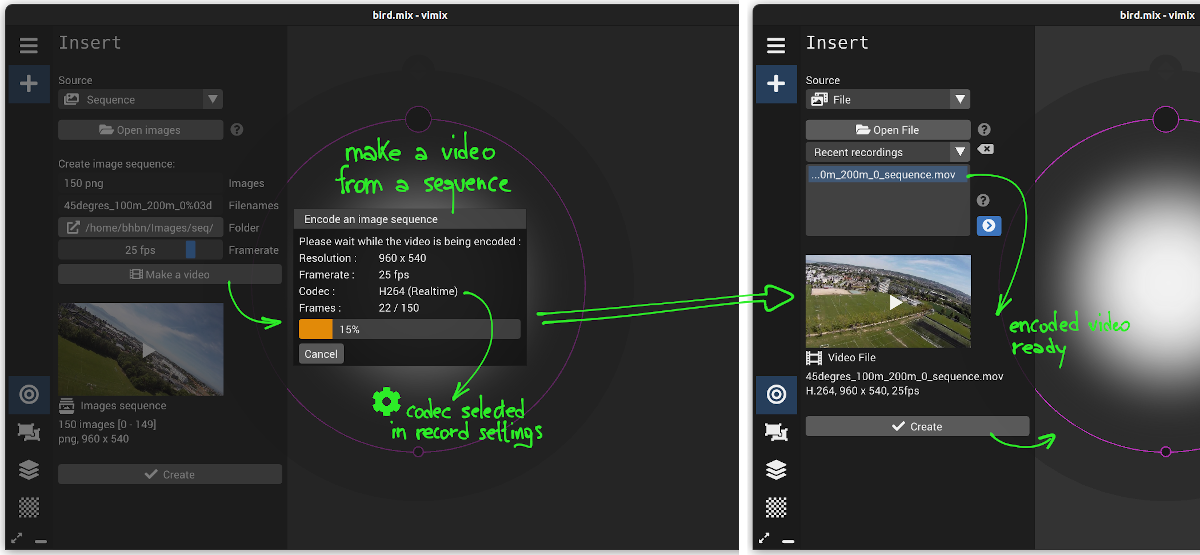
- If the list of filenames does not allow vimix to make a numbered sequence, it still allows to make a video out of the list of filenames as listed in the dialog, typically in alphabetical order (option A above).
When making a video out of a list of filenames, the encoding takes a bit of time and the dialog closes when finished. A source with the produced video recording can then be created:
Open Sound Control
About vimix
