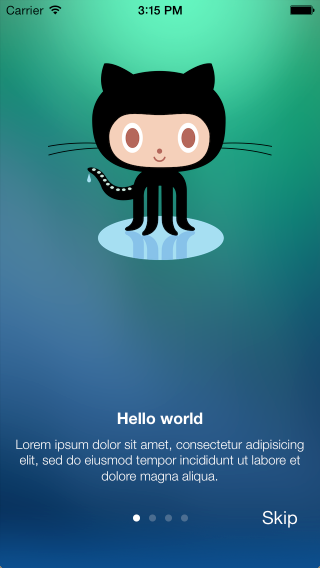
This is highly customizable drop-in solution for introduction views. Some features (remember, most features are optional and can be turned off):
- beautiful demo project to look on some examples
- customizability is unlimited, one can make complex introView with animations and interactive pages, so do not limit yourself with existing examples
- for each basic page:
- background (with cross-dissolve transition between pages)
- custom iOS7 motion effects (parallax) on background
- title view (+ Y position)
- title text (+ font, color and Y position)
- description text (+ font, color, width and Y position)
- subviews array (added to page after building default layout)
- possibility to set your own custom view for page:
- pageWithCustomView:
- pageWithCustomViewFromNibNamed:
- possibility to set block action on page events:
- pageDidLoad
- pageDidAppear
- pageDidDisappear
- many options to customize parent view:
- swipe from last page to close
- switching pages with one simple tap
- custom background image or color
- custom page control
- custom skip button
- pinned titleView (+ Y position, can be hidden on some pages)
- delegate protocol to listen:
- introDidFinish:
- intro:pageAppeared:withIndex:
- actions on IntroView:
- setPages:
- showInView:animateDuration:
- hideWithFadeOutDuration:
- setCurrentPageIndex:animated:
- storyboard/IB support
- and many more...
You can setup EAIntroView using Carthage, CocoaPods or completely manually.
-
Add
EAIntroViewto your project'sCartfile:github "ealeksandrov/EAIntroView"
-
Run
carthage updatein your project directory. -
On your application targets’ “General” settings tab, in the “Linked Frameworks and Libraries” section, drag and drop EAIntroView.framework and EARestrictedScrollView.framework from the
Carthage/Build/iOS/folder on disk. -
On your application targets’ “Build Phases” settings tab, click the “+” icon and choose “New Run Script Phase”. Create a Run Script with the following contents:
/usr/local/bin/carthage copy-frameworks
add the paths to the frameworks under “Input Files”:
$(SRCROOT)/Carthage/Build/iOS/EAIntroView.framework
$(SRCROOT)/Carthage/Build/iOS/EARestrictedScrollView.framework
and the paths to the copied frameworks to the “Output Files”:
$(BUILT_PRODUCTS_DIR)/$(FRAMEWORKS_FOLDER_PATH)/EAIntroView.framework
$(BUILT_PRODUCTS_DIR)/$(FRAMEWORKS_FOLDER_PATH)/EARestrictedScrollView.framework
-
Add EAIntroView to your project's
Podfile:pod 'EAIntroView'
-
Run
pod updateorpod installin your project directory.
-
Add EARestrictedScrollView header and implementation to your project (2 files total).
-
Add
EAIntroPageandEAIntroViewheaders and implementations to your project (4 files total). -
You can now use
EAIntroViewby adding the following import:import EAIntroView
#import <EAIntroView/EAIntroView.h>
Sample project have many examples of customization. Here are only simple ones.
Each page created with [EAIntroPage page] class method. Then you can customize any property, all of them are optional. Another approach is to pass your own (can be nib), custom view in EAIntroPage, this way most other options are ignored.
// basic
EAIntroPage *page1 = [EAIntroPage page];
page1.title = @"Hello world";
page1.desc = sampleDescription1;
// custom
EAIntroPage *page2 = [EAIntroPage page];
page2.title = @"This is page 2";
page2.titleFont = [UIFont fontWithName:@"Georgia-BoldItalic" size:20];
page2.titlePositionY = 220;
page2.desc = sampleDescription2;
page2.descFont = [UIFont fontWithName:@"Georgia-Italic" size:18];
page2.descPositionY = 200;
page2.titleIconView = [[UIImageView alloc] initWithImage:[UIImage imageNamed:@"title2"]];
page2.titleIconPositionY = 100;
// custom view from nib
EAIntroPage *page3 = [EAIntroPage pageWithCustomViewFromNibNamed:@"IntroPage"];
page3.bgImage = [UIImage imageNamed:@"bg2"];Once all pages have been created, you are ready to create the introduction view. Just pass them in right order in the introduction view. You can also pass array of pages after IntroView's initialization, it will rebuild its contents.
EAIntroView *intro = [[EAIntroView alloc] initWithFrame:self.view.bounds andPages:@[page1,page2,page3,page4]];Don't forget to set the delegate if you want to use any callbacks.
[intro setDelegate:self];[intro showInView:self.view animateDuration:0.0];Since 1.3.0 EAIntroView supports init from IB. Since 2.0.0 EAIntroPage supports it too.
- Drop
UIViewto your IB document. - Set its class to
EAIntroView. - Create
IBOutletproperty in your view controller:@property(nonatomic,weak) IBOutlet EAIntroView *introView;. - Connect
IBOutletwithEAIntroViewin IB. - Build array of pages (you can use
pageWithCustomViewFromNibNamed:here with separate nibs for each page). - Pass pages array to
EAIntroViewproperty insetPages:.
Created and maintained by Evgeny Aleksandrov (@ealeksandrov).
EAIntroView is available under the MIT license. See the LICENSE.md file for more info.


