This is simple guide on how to connect ESP32 as the client to Arduino Nano 33 BLE sense as the server (peripheral) via Bluetooth (BLE)
This repository provides documentation and code examples for connecting an ESP32 device to an Arduino Nano 33 BLE Sense using Bluetooth Low Energy (BLE). By following the provided instructions, you can establish a wireless connection and transfer data between the two devices.
- Introduction
- Hardware Setup
- Software Configuration
- Code Examples
- Pairing and Data Transfer
- Testing and Troubleshooting
- Contributing
- License
Bluetooth Low Energy (BLE) has revolutionized the world of wireless communication by offering a power-efficient solution for connecting devices in the IoT and smart technology space. BLE enables devices to communicate wirelessly, with minimal energy consumption, making it an ideal choice for battery-powered devices and applications where data transfer and control are paramount.
In the realm of BLE, devices are typically categorized into two roles: centrals and peripherals. Centrals are the devices that initiate connections, scan for nearby peripherals, and request data. Peripherals, on the other hand, are devices that advertise their presence, respond to connection requests, and provide data. In our setup, we will be using the ESP32 as the central device, responsible for establishing and managing the connection, and the Arduino Nano 33 BLE Sense as the peripheral device, which will respond to connection requests and provide data.
The main reason we are using ESP32 as the client and not another Nano 33 BLE is because it is more powerful and it can connect to several peripherals simultaneously, and you might need it incase you need to send the data from the Nano to the Cloud
The communication between BLE devices is organized around a hierarchical structure involving services, characteristics, and descriptors. Services are collections of related data and functionalities offered by a peripheral device. Characteristics represent individual data points within a service, and they can be read, written, or notified. Descriptors provide additional information about characteristics.
This repository is your guide to connecting these devices and exploring the capabilities of BLE in your projects. We will cover the hardware setup, software configuration, and code examples to help you establish a reliable BLE connection between the ESP32 and the Arduino Nano 33 BLE Sense. By following these instructions, you'll be able to send and receive data efficiently, opening up a world of possibilities for centralized smart home control and data transfer.
Let's get into the specifics of the hardware and software setup, understand the essentials of BLE, and get hands-on with code examples to connect your ESP32 to the Arduino Nano 33 BLE Sense via BLE.
Remember, this document serves as a simple guide on how to connect the two devices together via BLE. If you're interested in sending data between the devices or enabling more advanced communication features, we have a separate project that covers these aspects.
- Project Title: Link to the Other Project Repository
In the linked project, you'll find comprehensive information on how to establish data communication between the ESP32 and Arduino Nano 33 BLE Sense devices. It covers data transfer, synchronization, and advanced features to take your BLE communication to the next level.
Feel free to explore the linked project for more advanced usage scenarios and capabilities.
- ESP32
- Arduino Nano 33 BLE Sense
- Cables and connectors (if applicable)
Detailed instructions on how to physically connect the ESP32 and Arduino Nano 33 BLE Sense, including wiring, pins, and any additional components.
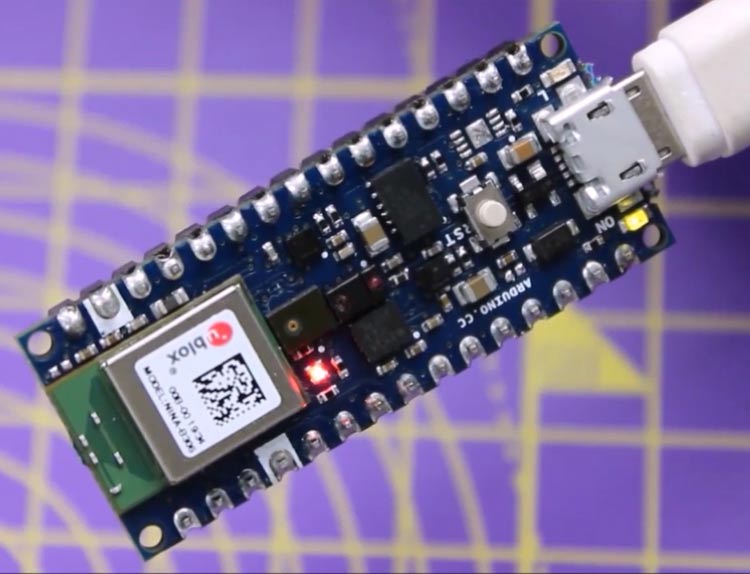
Connecting the ESP32 and Arduino Nano 33 BLE Sense to your PC is a straightforward process. Both devices can be powered and programmed via USB connections.
-
ESP32:
-
Plug one end of a USB cable into the ESP32 board.
-
Connect the other end of the USB cable to an available USB port on your PC.
-
The ESP32 can be used as a central device to establish a BLE connection.
-
-
Arduino Nano 33 BLE Sense:
- Similarly, connect one end of a USB cable into the Arduino Nano 33 BLE Sense board.
- Connect the other end of the USB cable to another available USB port on your PC.
- The Arduino Nano 33 BLE Sense is configured as a peripheral device, ready to respond to connection requests.
credits : circuitdigest.com
Once connected, both boards will be powered and ready for communication with your PC. You can proceed with software setup and code implementation for BLE communication.
This simple USB connection setup is the foundation for establishing a BLE connection between the ESP32 and Arduino Nano 33 BLE Sense, enabling data transfer and control.
Before you can start working with BLE communication on the ESP32 and Arduino Nano 33 BLE Sense, you need to set up the required software and libraries. Here's how you can do this using both the Arduino IDE and the Arduino Web Editor:
-
Install the Arduino IDE: If you haven't already, download and install the Arduino IDE.
-
Install ESP32 Board Support:
- Open the Arduino IDE.
- Go to "File" > "Preferences."
- In the "Additional Boards Manager URLs" field, enter the following URL:
https://dl.espressif.com/dl/package_esp32_index.json - Click "OK" to close the Preferences window.
- Go to "Tools" > "Board" > "Boards Manager."
- In the Boards Manager, search for "esp32" and install the "ESP32 by Espressif Systems" board.
-
Install the ArduinoBLE Library:
- In the Arduino IDE, go to "Sketch" > "Include Library" > "Manage Libraries."
- In the Library Manager, search for "ArduinoBLE" and install the "ArduinoBLE" library.
- Learn more about the ArduinoBLE library.
-
Install the ESP32 BLE Arduino Library:
- In the Arduino IDE, go to "Sketch" > "Include Library" > "Manage Libraries."
- In the Library Manager, search for "ESP32 BLE" and install the "ESP32 BLE" library.
- Learn more about the ESP32 BLE Arduino library.
-
Access the Arduino Web Editor: If you prefer using the Arduino Web Editor, you can access it here.
-
Install ESP32 Board Support:
- After opening the Arduino Web Editor, go to "Settings" (the gear icon in the lower-left corner).
- Under "Experimental," enable "Arduino ESP32" and save the settings.
-
Install the ArduinoBLE Library:
- In the Arduino Web Editor, go to "Libraries" on the left sidebar.
- Search for "ArduinoBLE" and click on it.
- Click the "Include Library" button to add it to your current project.
-
Install the ESP32 BLE Arduino Library:
- In the Arduino Web Editor, go to "Libraries" on the left sidebar.
- Search for "ESP32 BLE" and click on it.
- Click the "Include Library" button to add it to your current project.
By following these installation instructions, you'll have the necessary software, board support, and libraries in place to work with BLE on the ESP32 and Arduino Nano 33 BLE Sense.
#include "BLEDevice.h"

// The remote service we wish to connect to.
static BLEUUID serviceUUID("4fafc201-1fb5-459e-8fcc-c5c9c331914b");
// The characteristic of the remote service we are interested in.
static BLEUUID charUUID("beb5483e-36e1-4688-b7f5-ea07361b26a8");

// Various flags and variables for BLE operation.
static boolean doConnect = false;
static boolean connected = false;
static boolean doScan = false;
static BLERemoteCharacteristic* pRemoteCharacteristic;
static BLEAdvertisedDevice* myDevice;

// Callback function for characteristic notifications.
static void notifyCallback(
  BLERemoteCharacteristic* pBLERemoteCharacteristic,
  uint8_t* pData,
  size_t length,
  bool isNotify) {
    Serial.print("Notify callback for characteristic ");
    Serial.print(pBLERemoteCharacteristic->getUUID().toString().c_str());
    Serial.print(" of data length ");
    Serial.println(length);
    Serial.print("data: ");
    Serial.write(pData, length);
    Serial.println();
}

// Callback class for BLE client events.
class MyClientCallback : public BLEClientCallbacks {
  void onConnect(BLEClient* pclient) {
  }

  void onDisconnect(BLEClient* pclient) {
    connected = false;
    Serial.println("onDisconnect");
  }
};

// Function to establish a connection to the BLE server.
bool connectToServer() {
    Serial.print("Forming a connection to ");
    Serial.println(myDevice->getAddress().toString().c_str());

    BLEClient* pClient = BLEDevice::createClient();
    Serial.println(" - Created client");

    pClient->setClientCallbacks(new MyClientCallback());

    // Connect to the remote BLE Server.
    pClient->connect(myDevice);
    Serial.println(" - Connected to server");
    pClient->setMTU(517); // Set client to request maximum MTU from server (default is 23 otherwise)

    // Obtain a reference to the service in the remote BLE server.
    BLERemoteService* pRemoteService = pClient->getService(serviceUUID);
    if (pRemoteService == nullptr) {
      Serial.print("Failed to find our service UUID: ");
      Serial.println(serviceUUID.toString().c_str());
      pClient->disconnect();
      return false;
    }
    Serial.println(" - Found our service");

    // Obtain a reference to the characteristic in the service of the remote BLE server.
    pRemoteCharacteristic = pRemoteService->getCharacteristic(charUUID);
    if (pRemoteCharacteristic == nullptr) {
      Serial.print("Failed to find our characteristic UUID: ");
      Serial.println(charUUID.toString().c_str());
      pClient->disconnect();
      return false;
    }
    Serial.println(" - Found our characteristic");

    // Read the value of the characteristic.
    if (pRemoteCharacteristic->canRead()) {
      std::string value = pRemoteCharacteristic->readValue();
      if (value.length() == sizeof(uint8_t)) {
        uint8_t receivedByte = value[0];

        // Print the received byte as an integer
        Serial.print("The characteristic value was: ");
        Serial.println(receivedByte);
    }

    if (pRemoteCharacteristic->canNotify())
      pRemoteCharacteristic->registerForNotify(notifyCallback);

    connected = true;
    return true;
   }
}

/**
 * Scan for BLE servers and find the first one that advertises the service we are looking for.
 */
class MyAdvertisedDeviceCallbacks : public BLEAdvertisedDeviceCallbacks {
  void onResult(BLEAdvertisedDevice advertisedDevice) {
    Serial.print("BLE Advertised Device found: ");
    Serial.println(advertisedDevice.toString().c_str());

    // We have found a device, let's see if it contains the service we are looking for.
    if (advertisedDevice.haveServiceUUID() && advertisedDevice.isAdvertisingService(serviceUUID)) {
      BLEDevice::getScan()->stop();
      myDevice = new BLEAdvertisedDevice(advertisedDevice);
      doConnect = true;
      doScan = true;
    } // Found our server
  } // onResult
}; // MyAdvertisedDeviceCallbacks

void setup() {
  Serial.begin(115200);
  Serial.println("Starting Arduino BLE Client application...");
  BLEDevice::init("");

  // Retrieve a Scanner and set the callback to be informed when we
  // have detected a new device. Specify active scanning and start the
  // scan to run for 5 seconds.
  BLEScan* pBLEScan = BLEDevice::getScan();
  pBLEScan->setAdvertisedDeviceCallbacks(new MyAdvertisedDeviceCallbacks());
  pBLEScan->setInterval(1349);
  pBLEScan->setWindow(449);
  pBLEScan->setActiveScan(true);
  pBLEScan->start(5, false);
}

void loop() {
  // If the flag "doConnect" is true, we have scanned for and found the desired
  // BLE Server with which we wish to connect. Now, we connect to it. Once we are
  // connected, we set the connected flag to be true.
  if (doConnect == true) {
    if (connectToServer()) {
      Serial.println("We are now connected to the BLE Server.");
    } else {
      Serial.println("We have failed to connect to the server; there is nothing more we will do.");
    }
    doConnect = false;
  }

  // If we are connected to a peer BLE Server, update the characteristic each time we are reached
  // with the current time since boot.
  if (connected) {
    String

 newValue = "Time since boot: " + String(millis()/1000);
    Serial.println("Setting new characteristic value to \"" + newValue + "\"");

    // Set the characteristic's value to be the array of bytes that is actually a string.
    pRemoteCharacteristic->writeValue(newValue.c_str(), newValue.length());
  } else if (doScan) {
    BLEDevice::getScan()->start(0);
  }

  delay(1000); // Delay a second between loops.
}The provided code is an example of a BLE client application that connects to a remote BLE server. It demonstrates several key concepts and functionalities necessary for BLE communication.
serviceUUIDandcharUUID: These static variables define the UUIDs of the remote service and characteristic that the client is interested in. The UUIDs serve as unique identifiers for the service and characteristic on the remote server.
-
MyClientCallback: This class defines a callback for BLE client events, including connection and disconnection events. It's used to handle client-related events. -
BLEDevice::createClient(): Creates a new BLE client instance. -
pClient->setClientCallbacks(new MyClientCallback()): Associates the client with the callback defined inMyClientCallback.
-
connectToServer(): This function is responsible for forming a connection with the remote BLE server. -
pClient->connect(myDevice): Initiates a connection to the remote server, wheremyDevicerepresents the remote server's information. -
pClient->setMTU(517): Sets the Maximum Transmission Unit (MTU) to request from the server. The MTU determines the maximum size of data packets that can be transferred.
-
pClient->getService(serviceUUID): Obtains a reference to the service with the specified UUID on the remote server. -
pClient->getCharacteristic(charUUID): Obtains a reference to the characteristic with the specified UUID within the service on the remote server. -
Reading and writing data to the characteristic is handled here. If the characteristic supports reading, it reads and displays the value.
notifyCallback(): This callback function is invoked when notifications are received from the remote server's characteristic. It displays information about the received notifications.
-
The
MyAdvertisedDeviceCallbacksclass defines a callback for discovering BLE devices. -
The
setup()function initiates BLE client setup, including defining the characteristics to scan for. It also starts scanning for advertising devices. -
The
loop()function manages the connection process, as well as updating the remote characteristic's value when connected.
The code provides a comprehensive example of a BLE client application, demonstrating how to scan for devices advertising a specific service, establish a connection, and interact with remote characteristics. You can use this code as a foundation for creating your own BLE client applications.
/*
  This program uses the ArduinoBLE library to set up an Arduino Nano 33 BLE
  as a peripheral device and specifies a service and a characteristic.

  The circuit:
  - Arduino Nano 33 BLE.

  This example code is in the public domain.
*/

#include <ArduinoBLE.h>

const char* deviceServiceUuid = "4fafc201-1fb5-459e-8fcc-c5c9c331914b";
const char* deviceServiceCharacteristicUuid = "beb5483e-36e1-4688-b7f5-ea07361b26a8";

BLEService ourService(deviceServiceUuid);
BLEByteCharacteristic ourCharacteristic(deviceServiceCharacteristicUuid, BLERead | BLEWrite);

void setup() {
  Serial.begin(9600);
  while (!Serial);

  if (!BLE.begin()) {
    Serial.println("- Starting Bluetooth® Low Energy module failed!");
    while (1);
  }

  BLE.setLocalName("Arduino Nano 33 BLE (Peripheral)");
  BLE.setAdvertisedService(ourService);
  ourService.addCharacteristic(ourCharacteristic);
  BLE.addService(ourService);
  ourCharacteristic.writeValue(-1);
  BLE.advertise();

  Serial.println("Nano 33 BLE (Peripheral Device)");
  Serial.println(" ");
}

void loop() {
  BLEDevice central = BLE.central();
  Serial.println("- Discovering central device...");
  delay(500);

  if (central) {
    Serial.println("* Connected to the central device!");
    Serial.print("* Device MAC address: ");
    Serial.println(central.address());
    Serial.println(" ");

    while (central.connected()) {
      int charac = 1;
      Serial.print("* Writing value to our characteristic: ");
      Serial.println(charac);
      ourCharacteristic.writeValue((byte)charac);
      Serial.println("* Writing value to our characteristic done!");
      Serial.println(" ");
    }

  }

  Serial.println("* Disconnected from the central device!");
}The provided code sets up an Arduino Nano 33 BLE Sense as a peripheral device using the ArduinoBLE library. It defines a custom service and characteristic. Below is a detailed explanation of the key components and functionalities of the code:
deviceServiceUuidanddeviceServiceCharacteristicUuid: These variables store the UUIDs (Universally Unique Identifiers) for the service and characteristic. It's crucial that the UUIDs specified here match the ones used in the ESP32 code for successful communication.
-
BLEService ourService(deviceServiceUuid): Creates an instance of a BLE service with the specified UUID. -
BLEByteCharacteristic ourCharacteristic(deviceServiceCharacteristicUuid, BLERead | BLEWrite): Creates a characteristic within the service, allowing both read and write operations.
-
BLE.begin(): Initializes the Bluetooth Low Energy module. -
BLE.setLocalName("Arduino Nano 33 BLE (Peripheral)"): Sets the local name of the peripheral device, which will be visible to central devices during discovery. -
BLE.setAdvertisedService(ourService): Informs the BLE module about the advertised service. -
ourService.addCharacteristic(ourCharacteristic): Associates the characteristic with the service. -
BLE.addService(ourService): Adds the service to the list of services offered by the peripheral. -
ourCharacteristic.writeValue(-1): Initializes the characteristic value with -1. This can be modified as per specific requirements. -
BLE.advertise(): Starts advertising the peripheral's presence to central devices.
-
BLEDevice central = BLE.central(): Checks if a central device has connected. -
If a central device is found, it enters the loop to perform communication.
-
central.connected(): Checks if the central device is still connected. -
ourCharacteristic.writeValue((byte)charac): Writes a value (in this case, the integercharac) to the characteristic. -
When the central device disconnects, it goes back to searching for a new central device.
- The serial output provides information about the connection status and actions performed. This is useful for debugging and monitoring the behavior of the peripheral.
This code serves as a foundational example for setting up the Arduino Nano 33 BLE Sense as a peripheral device. Remember to ensure that the UUIDs in this code match the ones specified in the ESP32 code for successful communication.
CBelow are instructions on how to establish a BLE connection between the ESP32 and Arduino Nano 33 BLE Sense, including an overview of GATT (Generic Attribute Profile) for data transfer:
Bluetooth Low Energy (BLE) communication involves two roles: central and peripheral. The ESP32 will act as the central device, while the Arduino Nano 33 BLE Sense will be the peripheral. The communication between them relies on the Generic Attribute Profile (GATT), which defines how data is organized and transferred between devices.
-
Service: A container for characteristics that define a specific functionality. Services are identified by a UUID.
-
Characteristic: Represents a single data point within a service. Each characteristic has its own UUID and can be used to read, write, or notify data.
-
Descriptor: Describes the characteristic's value. It provides additional information about the characteristic.
-
Hardware Setup:
- Ensure that both the ESP32 and Arduino Nano 33 BLE Sense are powered and in proximity to each other.
-
UUID Matching:
- Make sure that the UUIDs used for services and characteristics in both the ESP32 and Arduino Nano 33 BLE Sense codes match. This is crucial for the devices to recognize each other.
-
Serial Monitor:
- Open the Serial Monitor for both devices. This allows you to view debug messages and monitor the connection process.
-
Central Device (ESP32):
- The ESP32 will initiate the connection. You should see messages in the Serial Monitor indicating the discovery of the central device.
-
Peripheral Device (Arduino Nano 33 BLE Sense):
- The Arduino Nano 33 BLE Sense will advertise its presence and the service and characteristic it offers.
-
Connection Establishment:
- Once the ESP32 detects the peripheral device, it will connect to it. You should see messages indicating a successful connection.
-
GATT Communication:
- Data transfer between the devices occurs through GATT characteristics. These characteristics can be read, written to, or used for notifications.
-
Data Transfer:
-
To send data from the central device (ESP32) to the peripheral (Arduino Nano 33 BLE Sense), you can use the
pRemoteCharacteristic->writeValue(data, length)function in the ESP32 code, wheredatais the data you want to send andlengthis the data length. -
To read data from the peripheral device (Arduino Nano 33 BLE Sense), you can use the
ourCharacteristic.writeValue(value)function, wherevalueis the data you want to send.
-
-
Monitoring:
- Continue to monitor the Serial Monitor of both devices to observe the data transfer and connection status.
-
Disconnect:
- When the connection is no longer needed, you can disconnect from the central device by disconnecting the ESP32 or Nano 33 BLE Sense from the power source.
By following these instructions, you can establish a BLE connection between the ESP32 and Arduino Nano 33 BLE Sense and facilitate data transfer through GATT characteristics. This enables you to exchange information between the central and peripheral devices seamlessly.
Common Troubleshooting Tips UUID Mismatch: Check that the UUIDs for services and characteristics match between the ESP32 and Arduino Nano 33 BLE Sense code. Mismatched UUIDs can lead to connection issues.
Signal Strength: Ensure that the devices are within the range for BLE communication. Weak signal strength may lead to connection problems.
Power: Verify that both devices are powered on and not in deep sleep or power-saving modes that can affect their ability to communicate.
Serial Monitor Debugging: Use the Serial Monitor to diagnose and debug issues. Review error messages and logs to identify potential problems.
Code Consistency: Check the code on both devices for consistency and correctness, including the initialization of services and characteristics.
Reset Devices: If you encounter persistent connection issues, try resetting both devices and reinitiating the connection.
Reupload Code: If problems persist, reupload the code to ensure that there are no code-related issues.
Firmware Updates: Ensure that both devices have the latest firmware and libraries installed, as outdated software can cause compatibility issues.
Environmental Interference: Be aware of potential environmental factors, such as interference from other electronic devices, which can disrupt BLE signals..
Remember, this document serves as a simple guide on how to connect the two devices together via BLE. If you're interested in sending data between the devices or enabling more advanced communication features, we have a separate project that covers these aspects.
- Project Title: Link to the Other Project Repository
In the linked project, you'll find comprehensive information on how to establish data communication between the ESP32 and Arduino Nano 33 BLE Sense devices. It covers data transfer, synchronization, and advanced features to take your BLE communication to the next level.
Feel free to explore the linked project for more advanced usage scenarios and capabilities.
We welcome contributions from the community to improve and expand this project. Whether you have bug fixes, new features, or documentation improvements in mind, your help is valuable. This document provides guidelines for contributing to the repository.
This project is open source and is released under the MIT License. Users are free to use, modify, and distribute the code under the terms of the license.