Manage multiple installations of node.js on a Windows computer.
tl;dr nvm, but for Windows, with an installer. Download Now!
There are situations where the ability to switch between different versions of Node.js can be very useful. For example, if you want to test a module you're developing with the latest bleeding edge version without uninstalling the stable version of node, this utility can help.
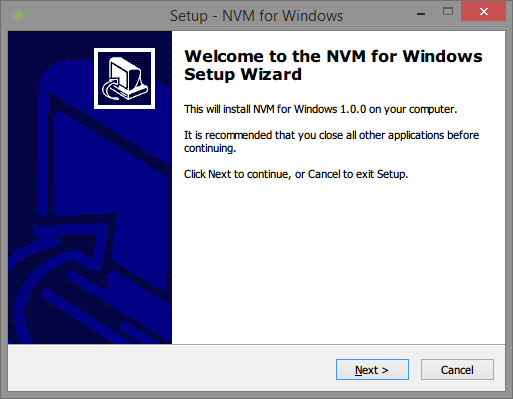
It comes with an installer (and uninstaller), because getting it should be easy. Please note, you need to uninstall any existing versions of node.js before installing NVM for Windows.
Download the latest installer from the releases.
To upgrade, run the new installer. It will safely overwrite the files it needs to update without touching your node.js installations. Make sure you use the same installation and symlink folder. If you originally installed to the default locations, you just need to click "next" on each window until it finishes.
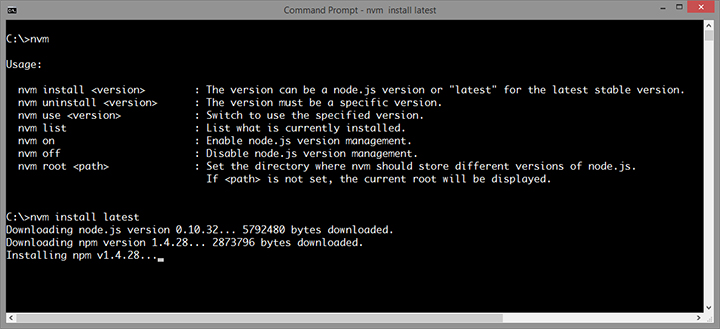
NVM for Windows is a command line tool. Simply type nvm in the console for help. The basic commands are:
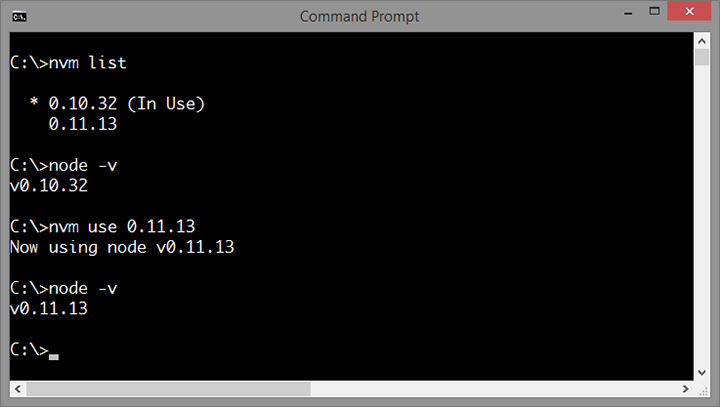
nvm arch [32|64]: Show if node is running in 32 or 64 bit mode. Specify 32 or 64 to override the default architecture.nvm install <version> [arch]: The version can be a node.js version or "latest" for the latest stable version. Optionally specify whether to install the 32 or 64 bit version (defaults to system arch). Set[arch]to "all" to install 32 AND 64 bit versions.nvm list [available]: List the node.js installations. Typeavailableat the end to show a list of versions available for download.nvm on: Enable node.js version management.nvm off: Disable node.js version management (does not uninstall anything).nvm proxy [url]: Set a proxy to use for downloads. Leave[url]blank to see the current proxy. Set[url]to "none" to remove the proxy.nvm uninstall <version>: Uninstall a specific version.nvm use <version> [arch]: Switch to use the specified version. Optionally specify 32/64bit architecture.nvm use <arch>will continue using the selected version, but switch to 32/64 bit mode based on the value supplied to<arch>.nvm root <path>: Set the directory where nvm should store different versions of node.js. If<path>is not set, the current root will be displayed.nvm version: Displays the current running version of NVM for Windows.
Please note that any global npm modules you may have installed are not shared between the various versions of node.js you have installed. Additionally, some npm modules may not be supported in the version of node you're using, so be aware of your environment as you work.
There are several version managers for node.js. Tools like nvm and n only run on Mac OSX and Linux. Windows users are left in the cold? No. nvmw and nodist are both designed for Windows. So, why another version manager for Windows?
The architecture of most node version managers for Windows rely on .bat files, which do some clever tricks to set or mimic environment variables.
Some of them use node itself (once it's downloaded), which is admirable, but prone to problems. Right around node 0.10.30, the installation
structure changed a little, causing some of these to just stop working with anything new.
Additionally, some users struggle to install these modules since it requires a little more knowledge of node's installation structure. I believe if it were easier for people to switch between versions, people might take the time to test their code on back and future versions... which is just good practice.
First and foremost, this version of nvm has no dependency on node. It's written in Go, which is a much more structured
approach than hacking around a limited .bat file. It does not rely on having an existing node installation. Plus, should the need arise, Go
offers potential for creating a Mac/Linux version on the same code base with a substanially easier migration path than converting a bunch of
batch to shell logic. bat > sh, it crazy, right?
The control mechanism is also quite different. There are two general ways to support multiple node installations with hot switching capabilities.
The first is to modify the system PATH any time you switch versions, or bypass it by using a .bat file to mimic the node executable and redirect
accordingly. This always seemed a little hackish to me, and there are some quirks as a result of this implementation.
The second option is to use a symlink. This concept requires putting the symlink in the system PATH, then updating its target to
the node installation directory you want to use. This is a straightforward approach, and seems to be what people recommend.... until they
realize just how much of a pain symlinks are on Windows. This is why it hasn't happened before.
In order to create/modify a symlink, you must be running as an admin, and you must get around Windows UAC (that annoying prompt). Luckily, this is
a challenge I already solved with some helper scripts in node-windows. As a result, NVM for Windows
maintains a single symlink that is put in the system PATH during installation only. Switching to different versions of node is a matter of
switching the symlink target. As a result, this utility does not require you to run nvm use x.x.x every time you open a console window.
When you do run nvm use x.x.x, the active version of node is automatically updated across all open console windows. It also persists
between system reboots, so you only need to use nvm when you want to make a change.
NVM for Windows comes with an installer, courtesy of a byproduct of my work on Fenix Web Server.
Overall, this project brings together some ideas, a few battle-hardened pieces of other modules, and support for newer versions of node.
I also wrote a simple data feed containing a list of node.js versions and their associated npm version. This is how NVM for Windows recognizes the "latest" stable version. It's free for anyone to use.
I needed it, plain and simple. Additionally, it's apparent that support for multiple versions is not coming to node core, or even something they care about. It was also an excuse to play with Go.
MIT.
Thanks to everyone who has submitted issues on and off Github, made suggestions, and generally helped make this a better project. Special thanks to @vkbansal, who has actively provided feedback throughout the releases.


