User_App_ROS_GazeboSimulationExample
Note: This tutorial assumes that you have completed tutorials:
ROS2 Humble - R2D2
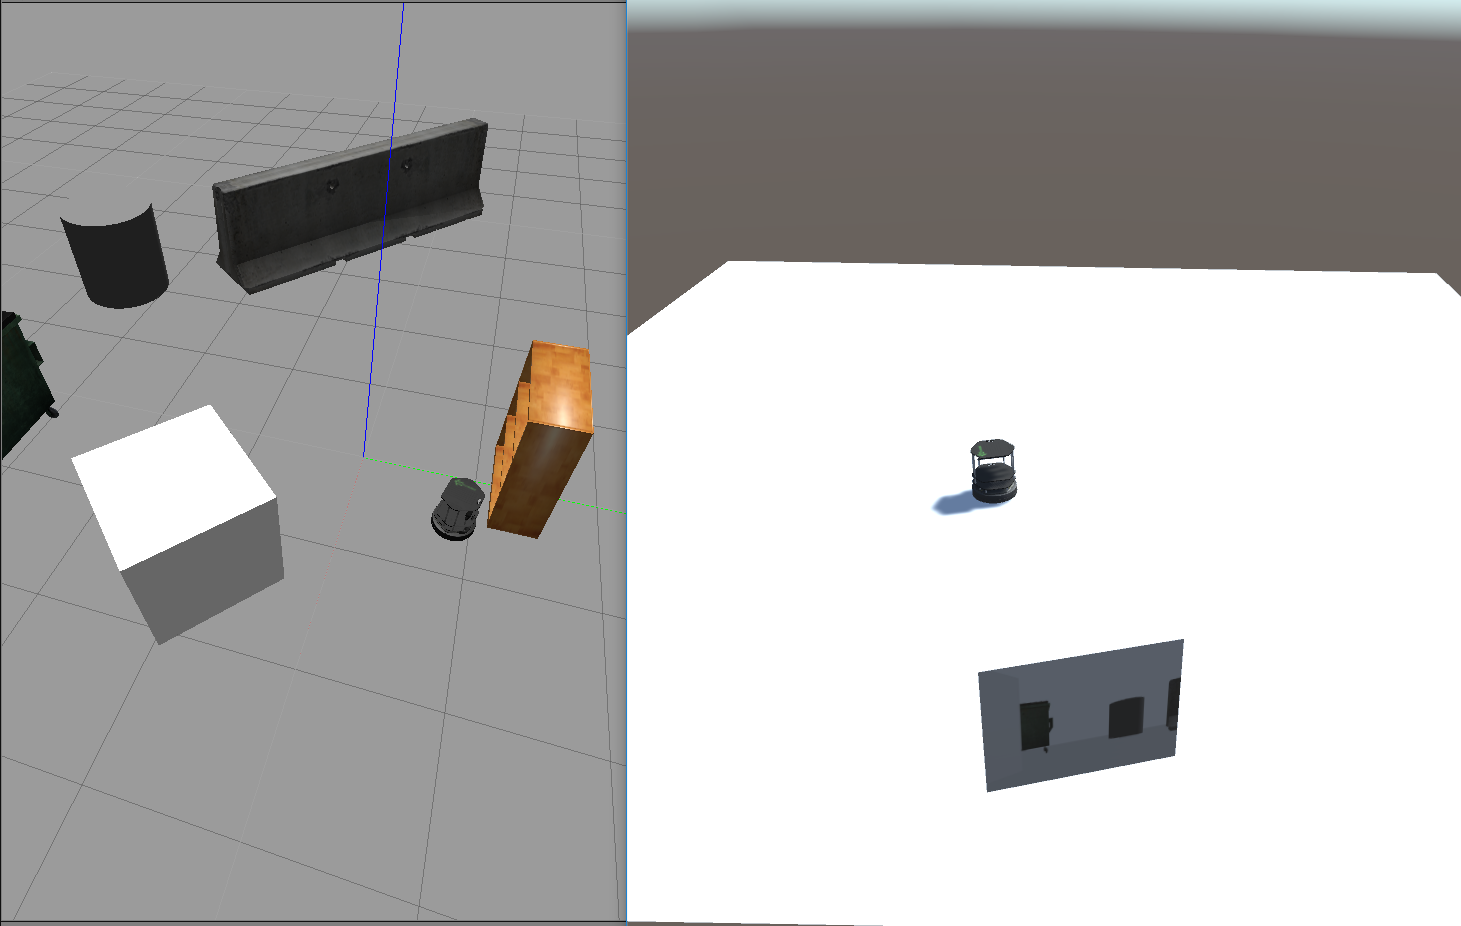
This tutorial aims to demonstrate the simulation of the R2D2 robot in Gazebo, with control and visualization capabilities provided by Unity. The tutorial is modular, consisting of three parts:
- Part 1: Streaming the R2D2 camera feed simulated in Gazebo to Unity.
- Part 2: Controlling the motion of R2D2 by publishing Joy data from Unity and subscribing to joint states and odometry.
- Part 3: Exploring alternative control methods in Unity using UI elements such as a touch screen joystick and slider.
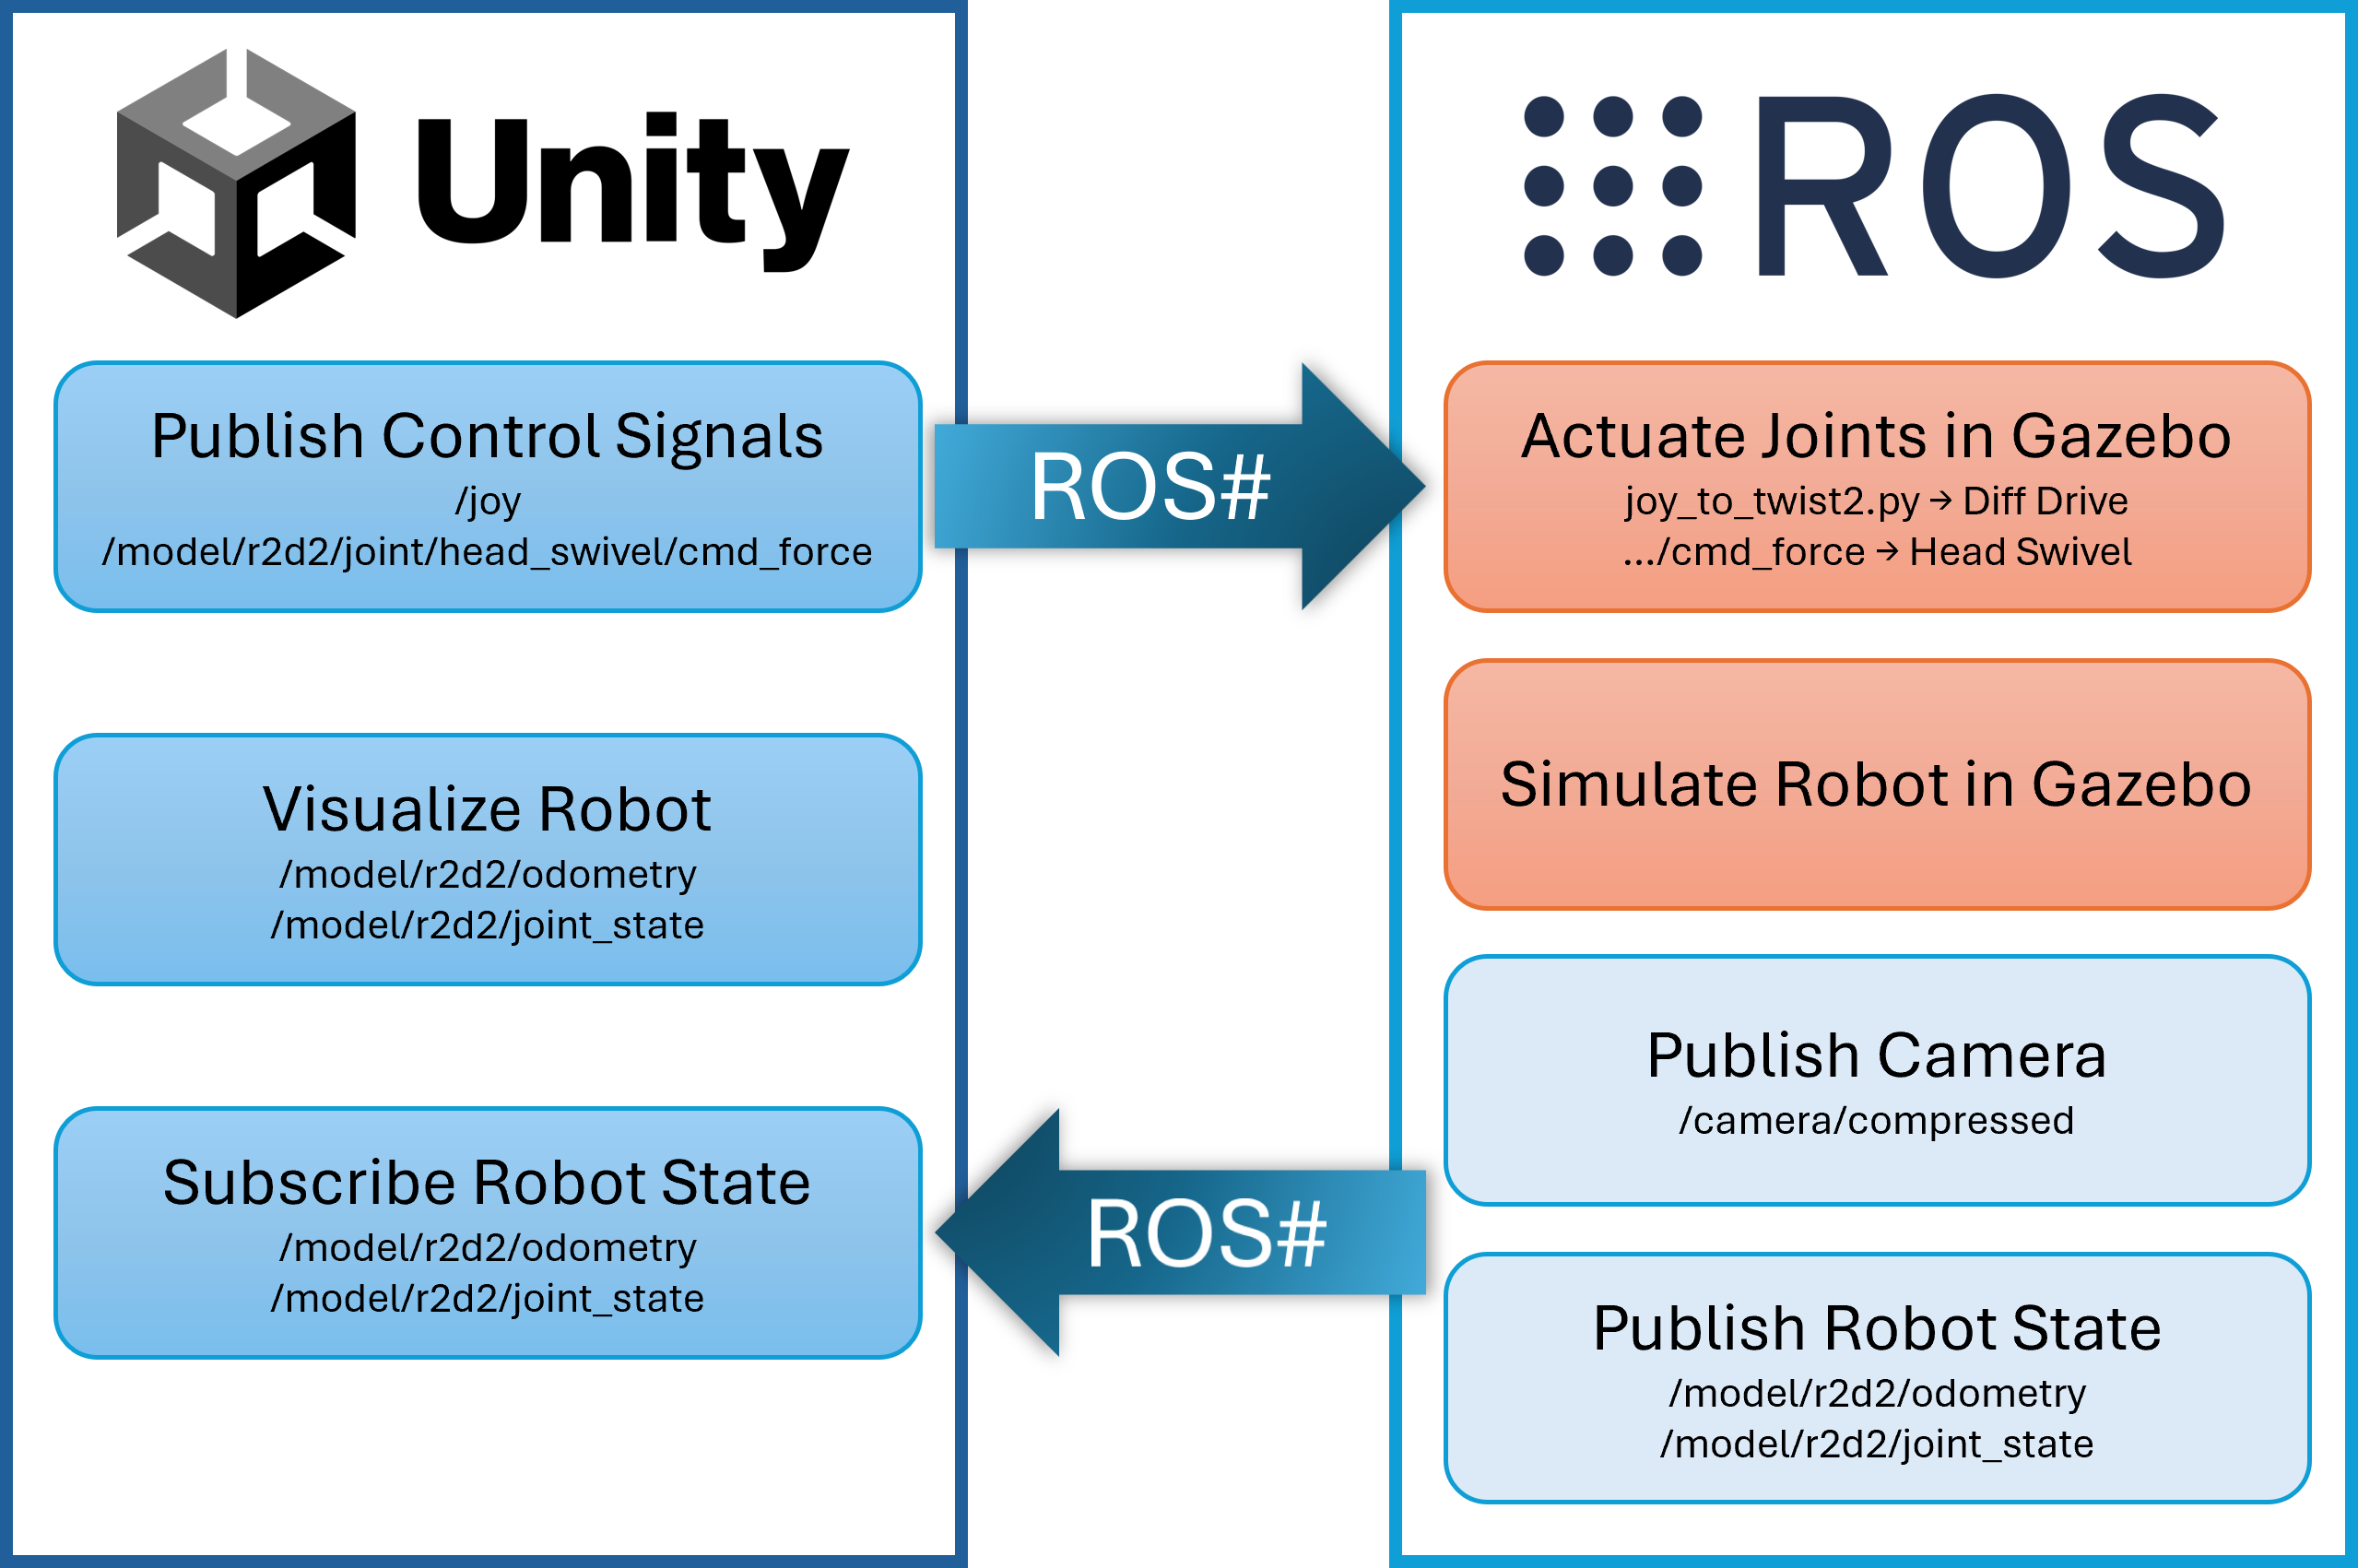
The following diagram provides an overview of the communication flow between Unity and ROS/Gazebo.
-
Messages to be sent by Unity using ROS#:
- /joy (introduced in Part 2)
- /model/r2d2/joint/head_swivel/cmd_force (introduced in Part 3)
-
Topics to be subscribed by Unity using ROS#:
- /camera/compressed (introduced in Part 1)
- /model/r2d2/odometry (introduced in Part 2)
- /model/r2d2/joint_state (introduced in Part 2)
-
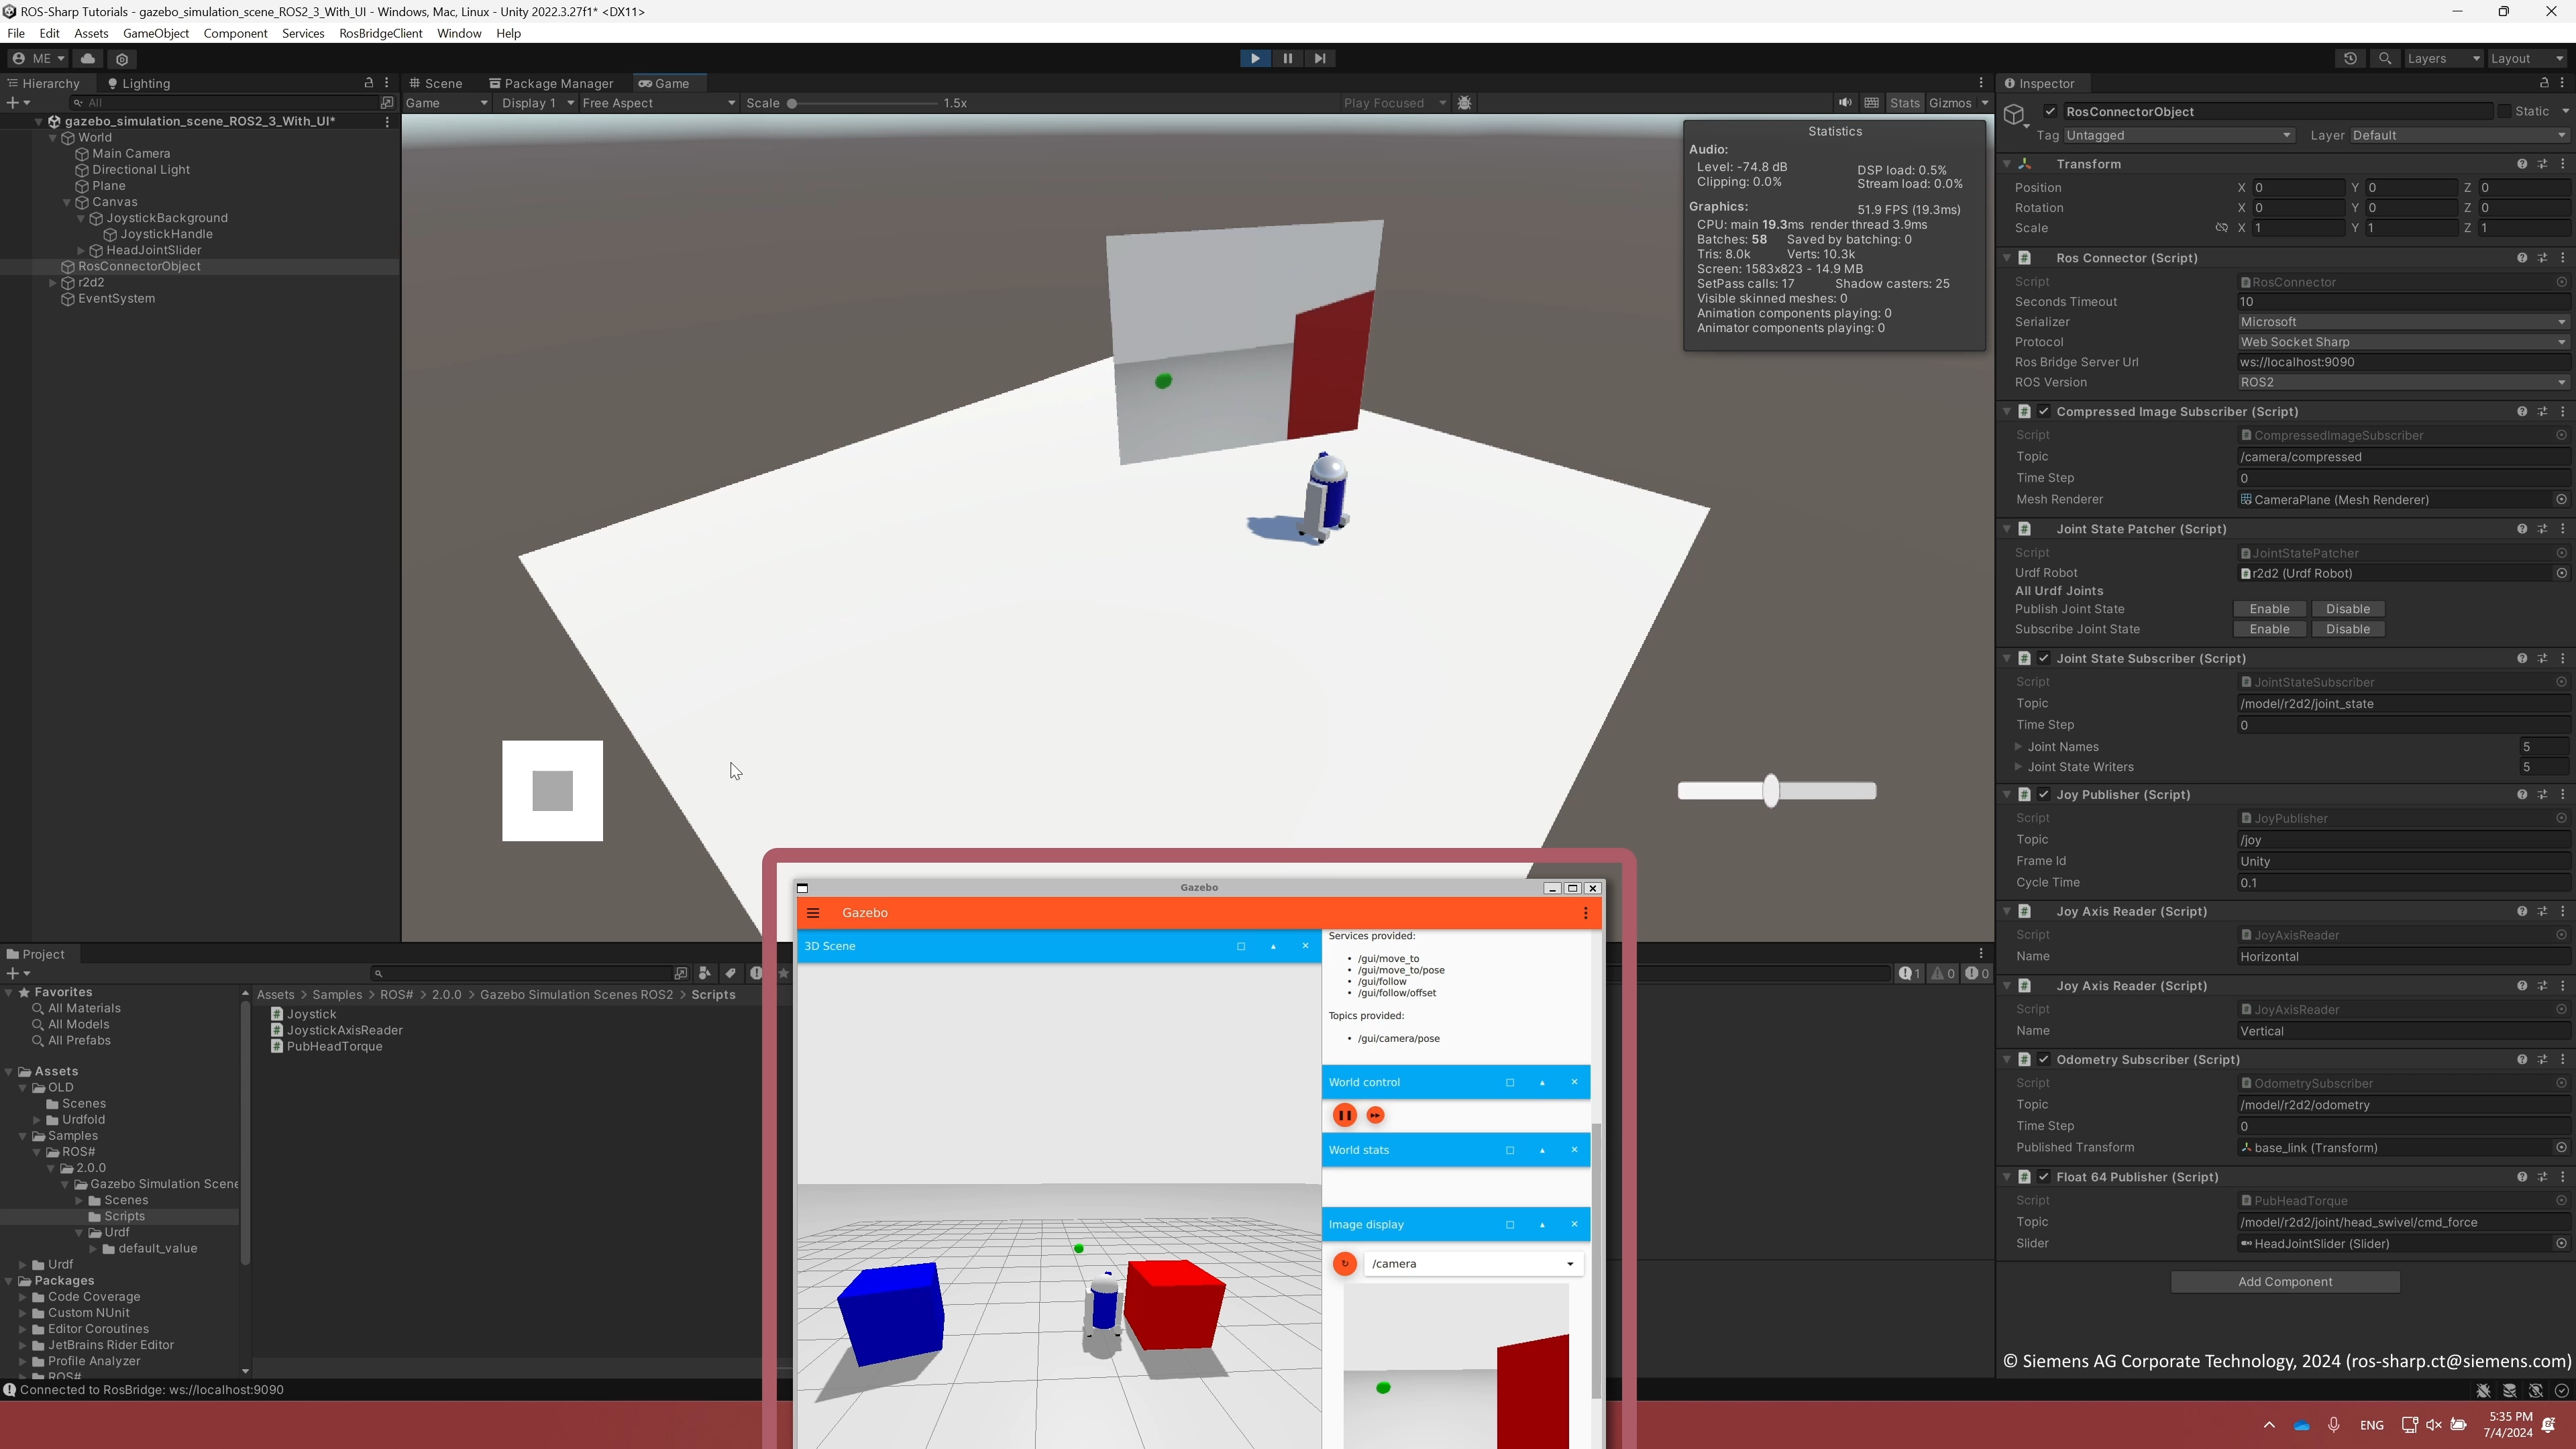
Use Gazebo Simulation Scene for ROS2 importable sample from Unity Package Manager to start.
-
Open the respective scene for each part and follow part-by-part to our tutorial video on YouTube.
-
Although covered in the videos, please note that meshes and textures of the robot are not included in this Unity project. Instead please import them yourself as described in Transfer URDF From ROS.
ros2 launch gazebo_simulation_scene2 gazebo_simulation_scene_camera.launch.py- You should only be able to see the camera stream in the Unity. Movement is not introduced yet.
ros2 launch gazebo_simulation_scene2 gazebo_simulation_scene_diff_drive.launch.py- You should be able to control R2D2 with your keyboard (or a game controller).
JoyAxisReaderscripts will provide theJoyPublisherwith the axes to read. The published Joy data will be converted to diff_drive (withjoy_to_twist2.py) for Gazebo to move the R2D2.
ros2 launch gazebo_simulation_scene2 gazebo_simulation_scene_complete_with_UI.launch.py- Using the
IAxisReaderC# interface, a custom axis reader is written in this part. This allows users to create and use their own input methods instead of using the default Unity input manager. You should be able to control R2D2 using the on-screen joystick. Further in this part, utilizing thegz-sim-apply-joint-force-systemGazebo plugin in the URDF file, you can publish a simple Float64 message using thePubHeadTorquescript and the slider to apply torque directly to the head joint.
ROS1 Noetic - TurtleBot2
This application of ROS# illustrates the communication between Unity and ROS in which the real time simulation takes place in Gazebo on the ROS side. The following figure illustrates the general schema of the application.
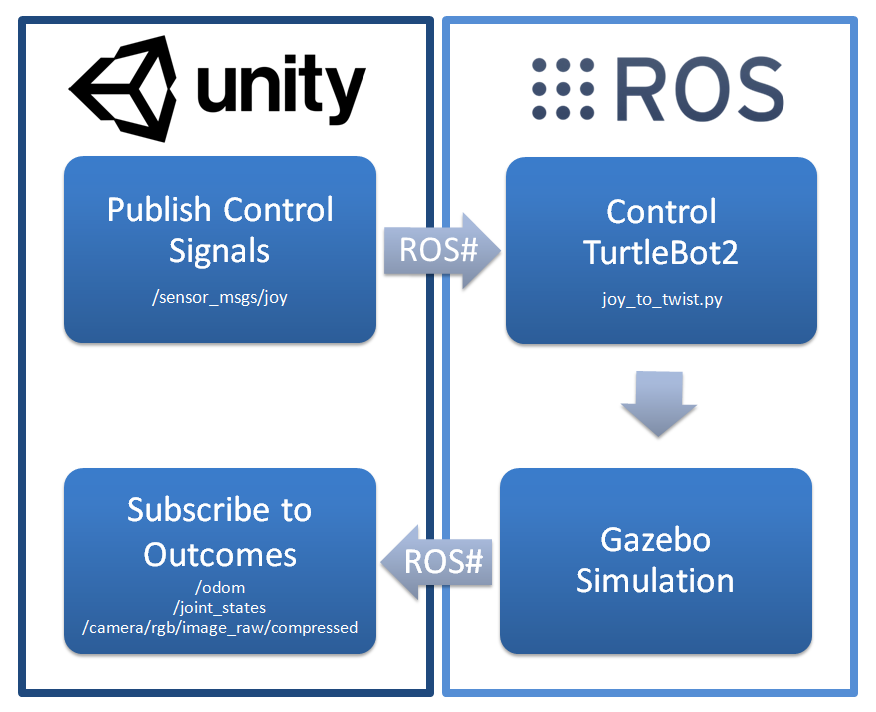
For simplicity, an existing Gazebo simulation is used to simulate the TurtleBot2 on the ROS side. The control signals are sent from Unity to ROS. Furthermore, the outcomes of ROS are captured by Unity for illustrative purposes.
-
Messages to be sent by Unity using ROS#:
/sensor_msgs/joy
-
Topics to be subscribed by Unity using ROS#:
/odom/joint_states/camera/rgb/image_raw/compressed
A joystick connected to Unity controls the TurtleBot2. Messages of the type /sensor_msgs/joy are sent to the rosbridge_websocket to be captured by ROS. The existing Gazebo simulation for TurtleBot2 requires messages of the type /geometry_msgs/twist on the ROS side. Therefore, the captured /sensor_msgs/joy messages are converted into /geometry_msgs/twist messages. This is accomplished by the ROS node joy_to_twist.
The Gazebo simulation publishes the topics /odom, /joint_states and /camera/rgb/image_raw/compressed, which are captured by Unity using rosbridge_websocket. Finally, the captured messages are linked to the URDF model in Unity.
Setting up the Unity scene
- Compose the Unity scene
GazeboSimulationSceneby following this video. - You can use
GazeboSimulationSceneexample for reference. Please note that meshes and textures of the robot are not included in this Unity project. Instead please import them yourself as described in Transfer URDF From ROS.
- Make sure that you have completed tutorials Install Gazebo, Install TurtleBot2, and Gazebo Simulation Example Setup
- Run the following command in your terminal:
$ roslaunch gazebo_simulation_scene gazebo_simulation_scene.launch
This will launch rosbridge_websocket, file_server, joy_to_twist, rqt_graph and a Gazebo simulation of the TurtleBot2 in the default turtlebot_world
As soon as all ROS nodes are launched, the robot in both simulations is ready to move.
- If desired, connect a game controller to Unity, in order to control the robot. Otherwise, use the arrow keys.
- When the
Playbutton in pressed, the ROS terminal will show that a client has connected and subscribes to some topics:
[INFO] [1520503573.897354, 57.560000]: Client connected.  1 clients total.
[INFO] [1520503574.689767, 58.330000]: [Client 0] Subscribed to /camera/rgb/image_raw/compressed
[INFO] [1520503574.697262, 58.340000]: [Client 0] Subscribed to /joint_states
[INFO] [1520503574.736412, 58.380000]: [Client 0] Subscribed to /odom
-
After clicking the refresh button in the
rqt_graph, a network similar to the following figure appears: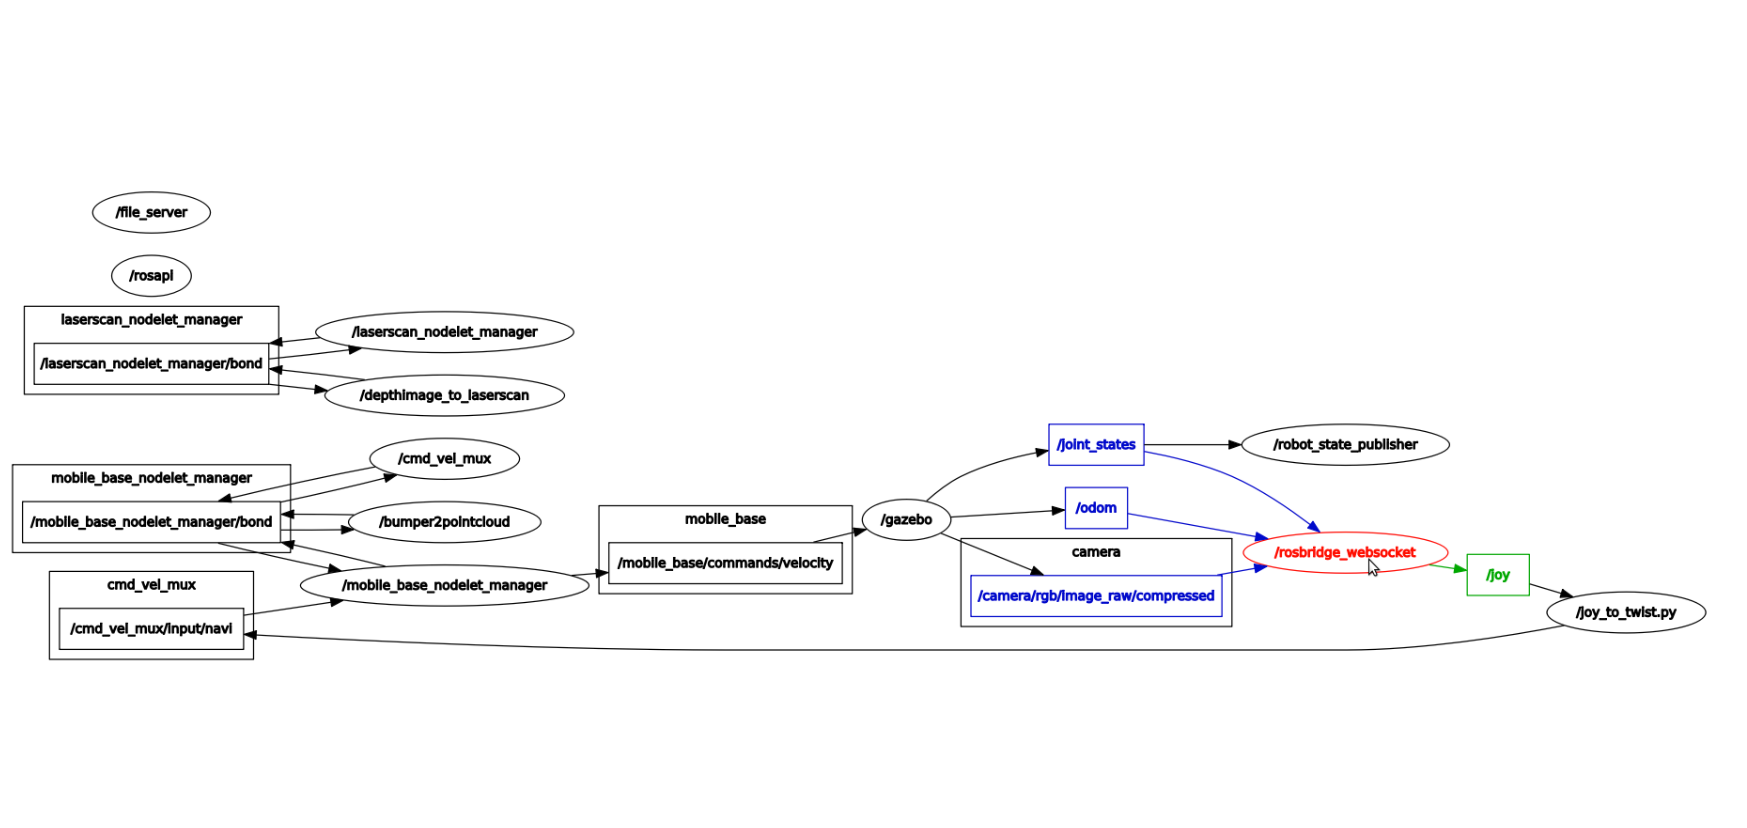
Here you see that the topic
/sensor_msgs/joyis published by Unity, and the topics/odom,/joint_statesand/camera/rgb/image_raw/compressedare subscribed by Unity usingrosbridge_websocket. -
Pressing the controller buttons or the arrow keys will move the robot in Gazebo and in Unity. Furthermore, the camera image of the TurtleBot2 in Gazebo is projected onto a plane in Unity for illustrative purposes.
The whole process of preparation and execution can be seen in the video mentioned above.
Next tutorial: Application examples without ROS communication or Fibonacci Action Client
Next tutorial: 2.4 Unity Simulation Example
© Siemens AG, 2017-2024