User_App_ROS_TransferURDFToROS
Note: This tutorial assumes that you have completed tutorial: 1 - Installation and Configuration.
- Using the following command, launch the
ros_sharp_communicationfromfile_serverROS package file which was previously downloaded in the ROS on Ubuntu tutorial. This will launchrosbridge_websocketandfile_server, with specific parameters so that ROS is ready to receive any information sent from Unity. For more info, see the file server package.
ROS2 Humble
# Inside the root of your workspace folder (not /src)
colcon build
source install/local_setup.bash
ros2 launch file_server2 ros_sharp_communication.launch.py

# If you are tranferring files larger than 100Mb:
ros2 launch file_server2 ros_sharp_communication.launch.py max_message_size:=<desired_size_in_bytes>
ROS1 Noetic
catkin_make
source devel/setup.bash
roslaunch file_server ros_sharp_communication.launch- In Unity go to
RosBridgeClient>Transfer URDF to ROS...
- The URDF tools in the ROS# Unity package do not use an additional ROS# Connector instance, but use the connector already present in the scene. If there is none, the button next to
ROS Connector Statuswill turn red and be pressable. If you click on it, you can create an empty game object with a ROS Connector component. Don't forget to adjust your ROS Connector settings!
Important Note: It is advised that you should increase the
Seconds Timeoutin your ROS Connector. Otherwise, it may disconnect without completing all the files.
- In ROS2, parameters are handled as
<node_name>:<parameter_name>and, in ROS1, just the parameter name is sufficient. You can select your ROS version from the ROS Connector andReset to Defaultbutton will fill the input files according to your ROS version. You can also hover your mouse over them to get a syntax hint.
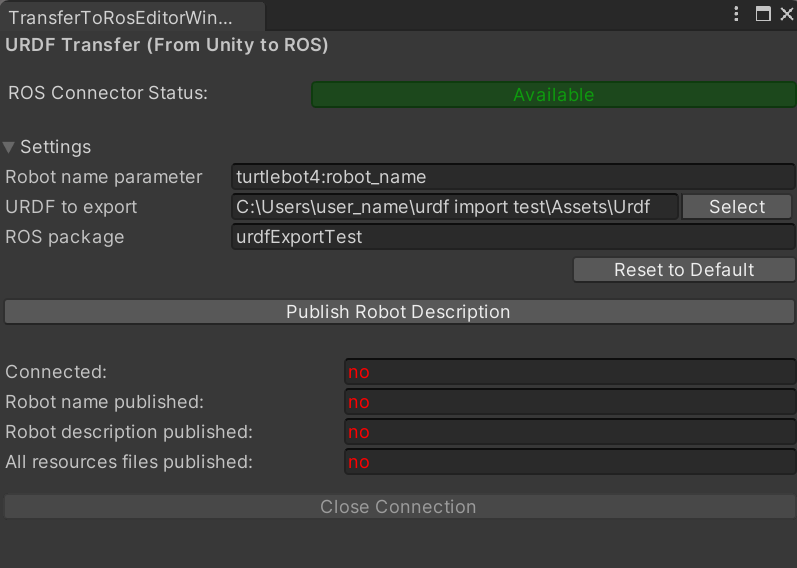
- Select a URDF file to export. In order to transfer meshes and texture files properly, the URDF file must be in the same root folder as the assets.
- Create a package and enter its name. The URDF file and any resources it needs will be transferred to this package. For example:
# Inside the /src of your workspace folder
ros2 pkg create --build-type ament_python --license Apache-2.0 urdf_export_test

# Inside the root of your workspace folder (not /src)
colcon build
source install/local_setup.bash- Initiate the transfer by clicking the button
Publish Robot Description. - Once all the files have been transferred, you will find them in the
installdirectory of your workspace folder. As for our example, it's<your_workspace_folder>/install/urdf_export_test/share/<robot_package_name>/
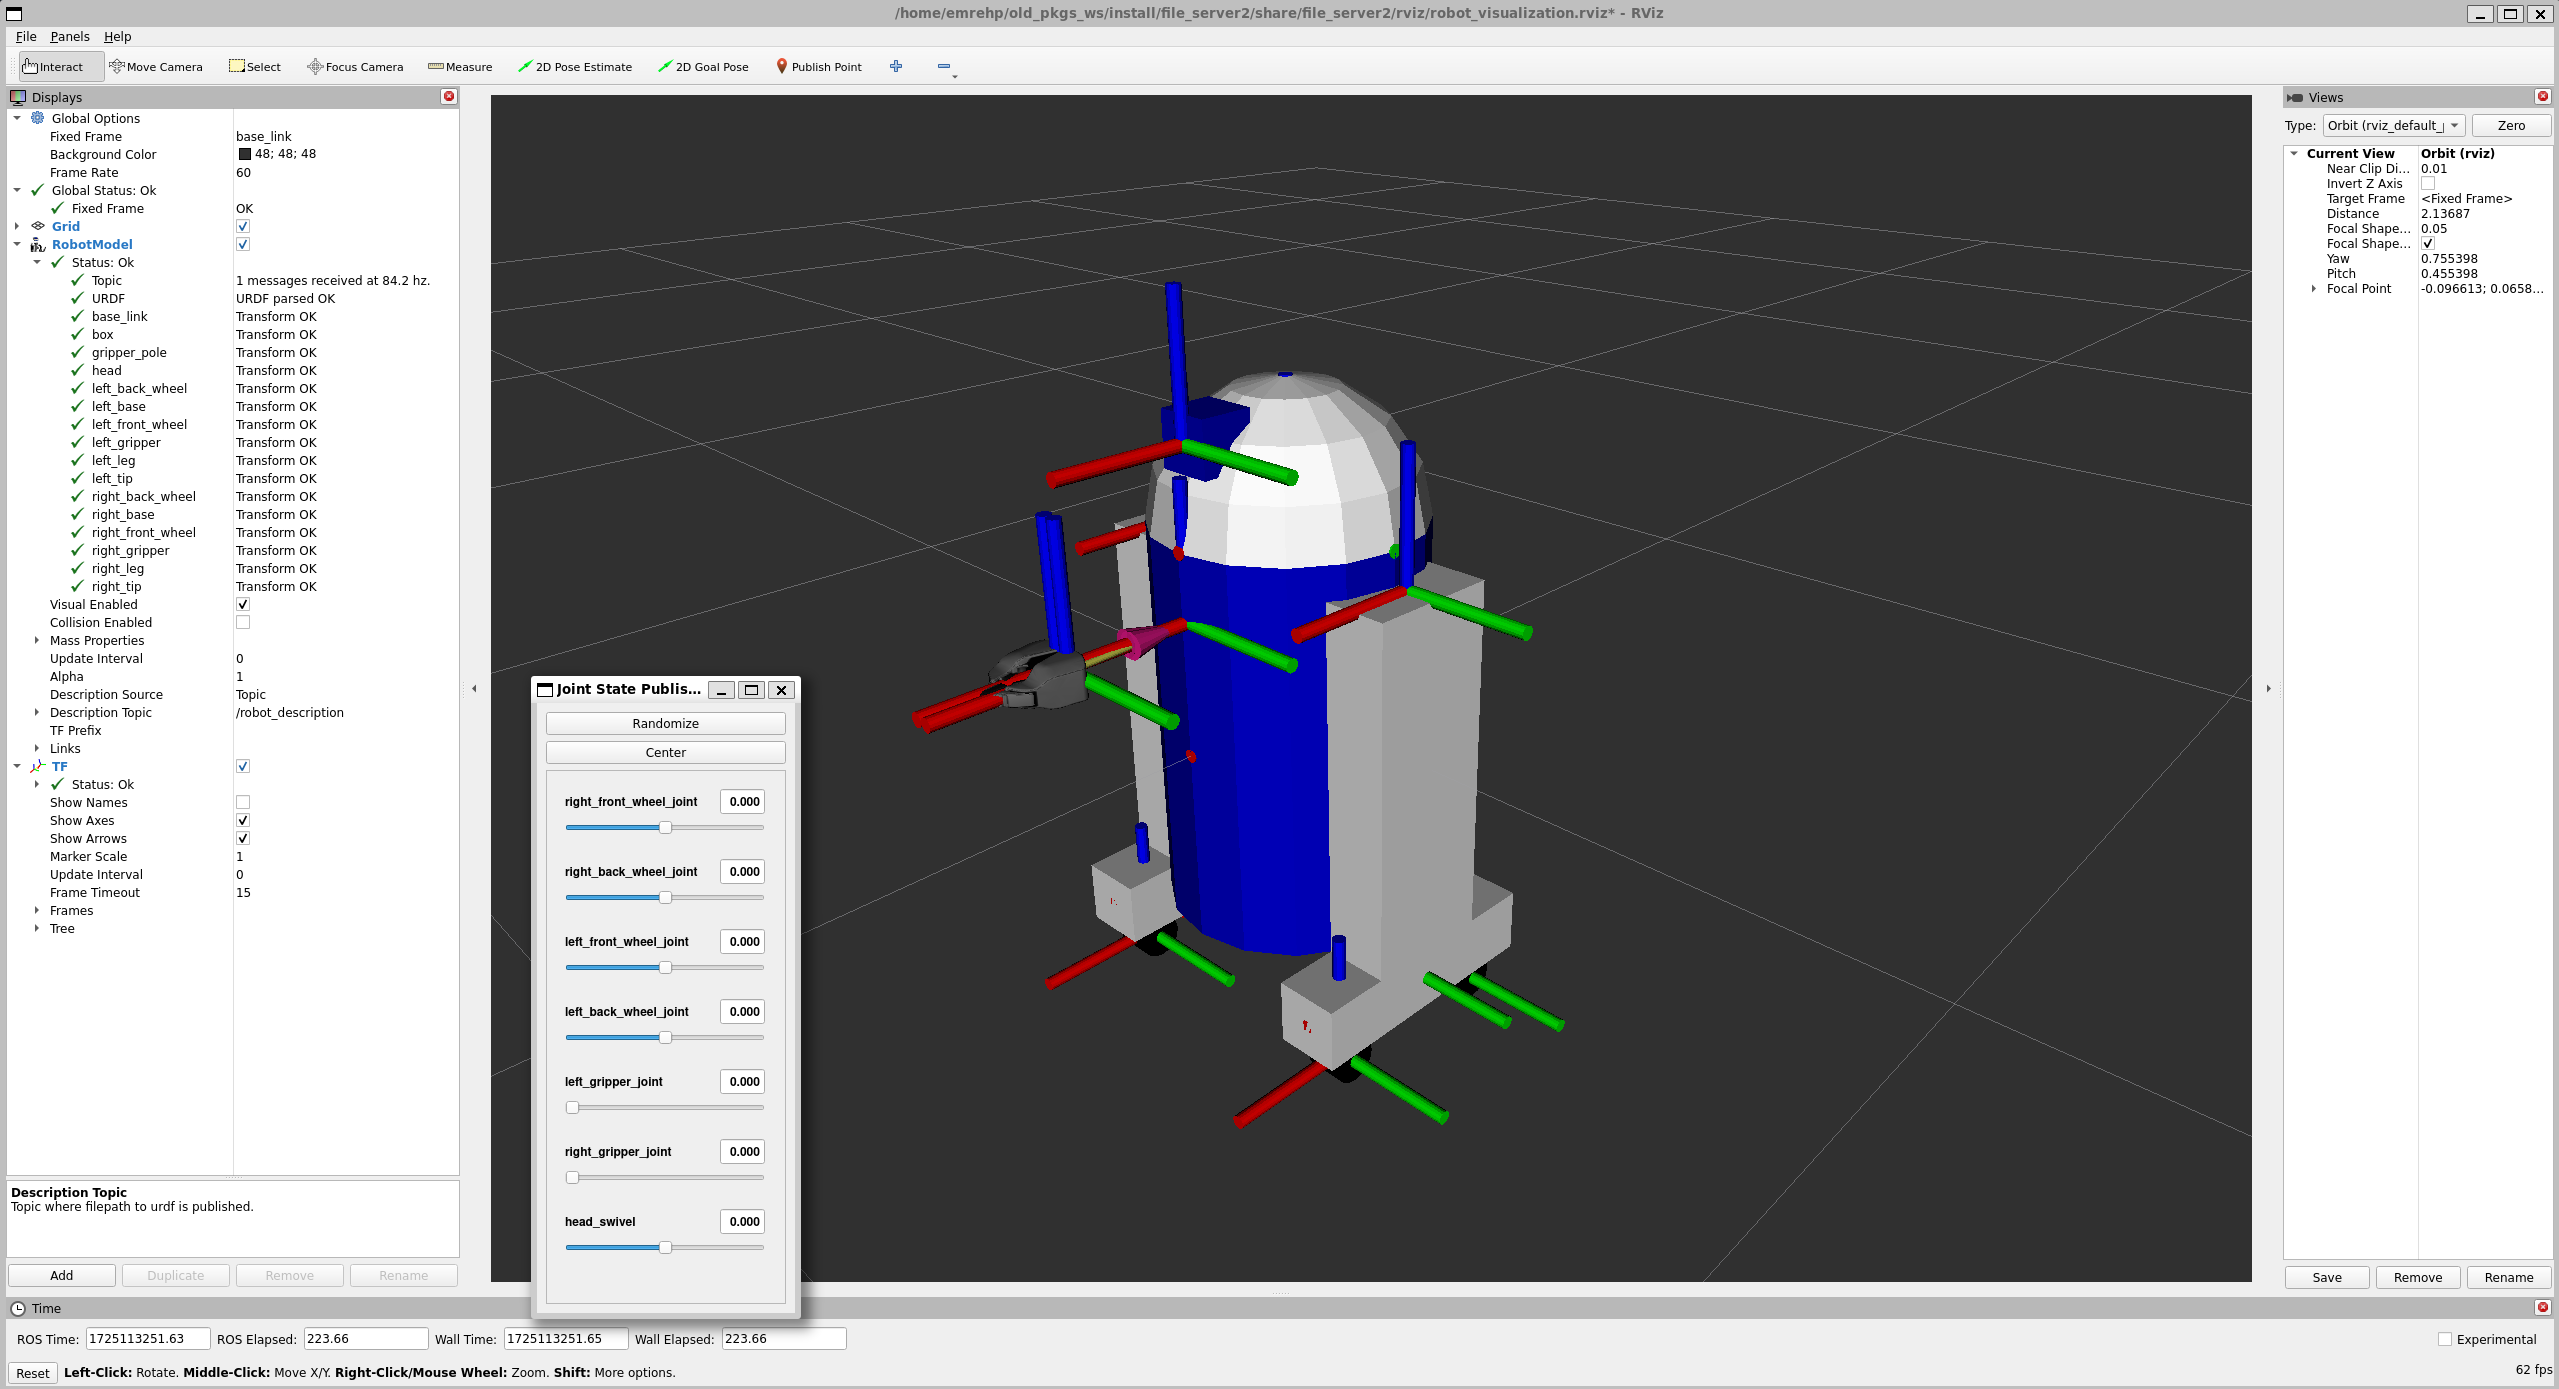
Using the visualize_robot launch file from the File Server package, you can view your robot in rviz, with robot/joint states synchronised with ROS.
ROS2 Humble
-
In your workspace folder, all URDF files will be in the package that you specified previously. As well, you can now access the
joint/robot_state_publisherROS2 parameters. -
To visualize the transferred robot;
# Inside the root of your workspace folder (not /src)
colcon build
source install/local_setup.bash
ros2 launch file_server2 visualize_robot.launch.py
This will launch robot_state_publisher, joint_state_publisher, and RVIZ.
- You can continue to use this launch file for your own purposes outside of this tutorial by modifying the launch parameters.
# Change urdf file name:
ros2 launch file_server2 visualize_robot.launch.py urdf_file:=your_robot_name.urdf

# Change package name:
ros2 launch file_server2 visualize_robot.launch.py package_name:=your_package_name

# Change default RVIZ config file: (Don't forget that it needs to be in the /rviz folder of your package!)
ros2 launch file_server2 visualize_robot.launch.py rviz_config_file:=your_rviz_config_file.rviz
ROS1 Noetic
- In your catkin workspace, all URDF files will be in the package that you specified previously. As well, you can now access the rosparams
/robot_descriptionand/robot_name. - To visualize the transferred robot, run the following command, replacing
<package name>by the name of the ROS package that you specified in Unity above:
roslaunch file_server visualize_robot.launch model:=$(rospack find <package name>)/robot_description.urdfThis will launch robot_state_publisher, joint_state_publisher, and RVIZ.
Next tutorial: Unity Simulation Scene Example
© Siemens AG, 2017-2024